Complete User Guide

How to Use YtLive Stream

Step-by-step instructions to get you started with 24/7 pre-recorded live streaming. From account creation to going live in minutes.

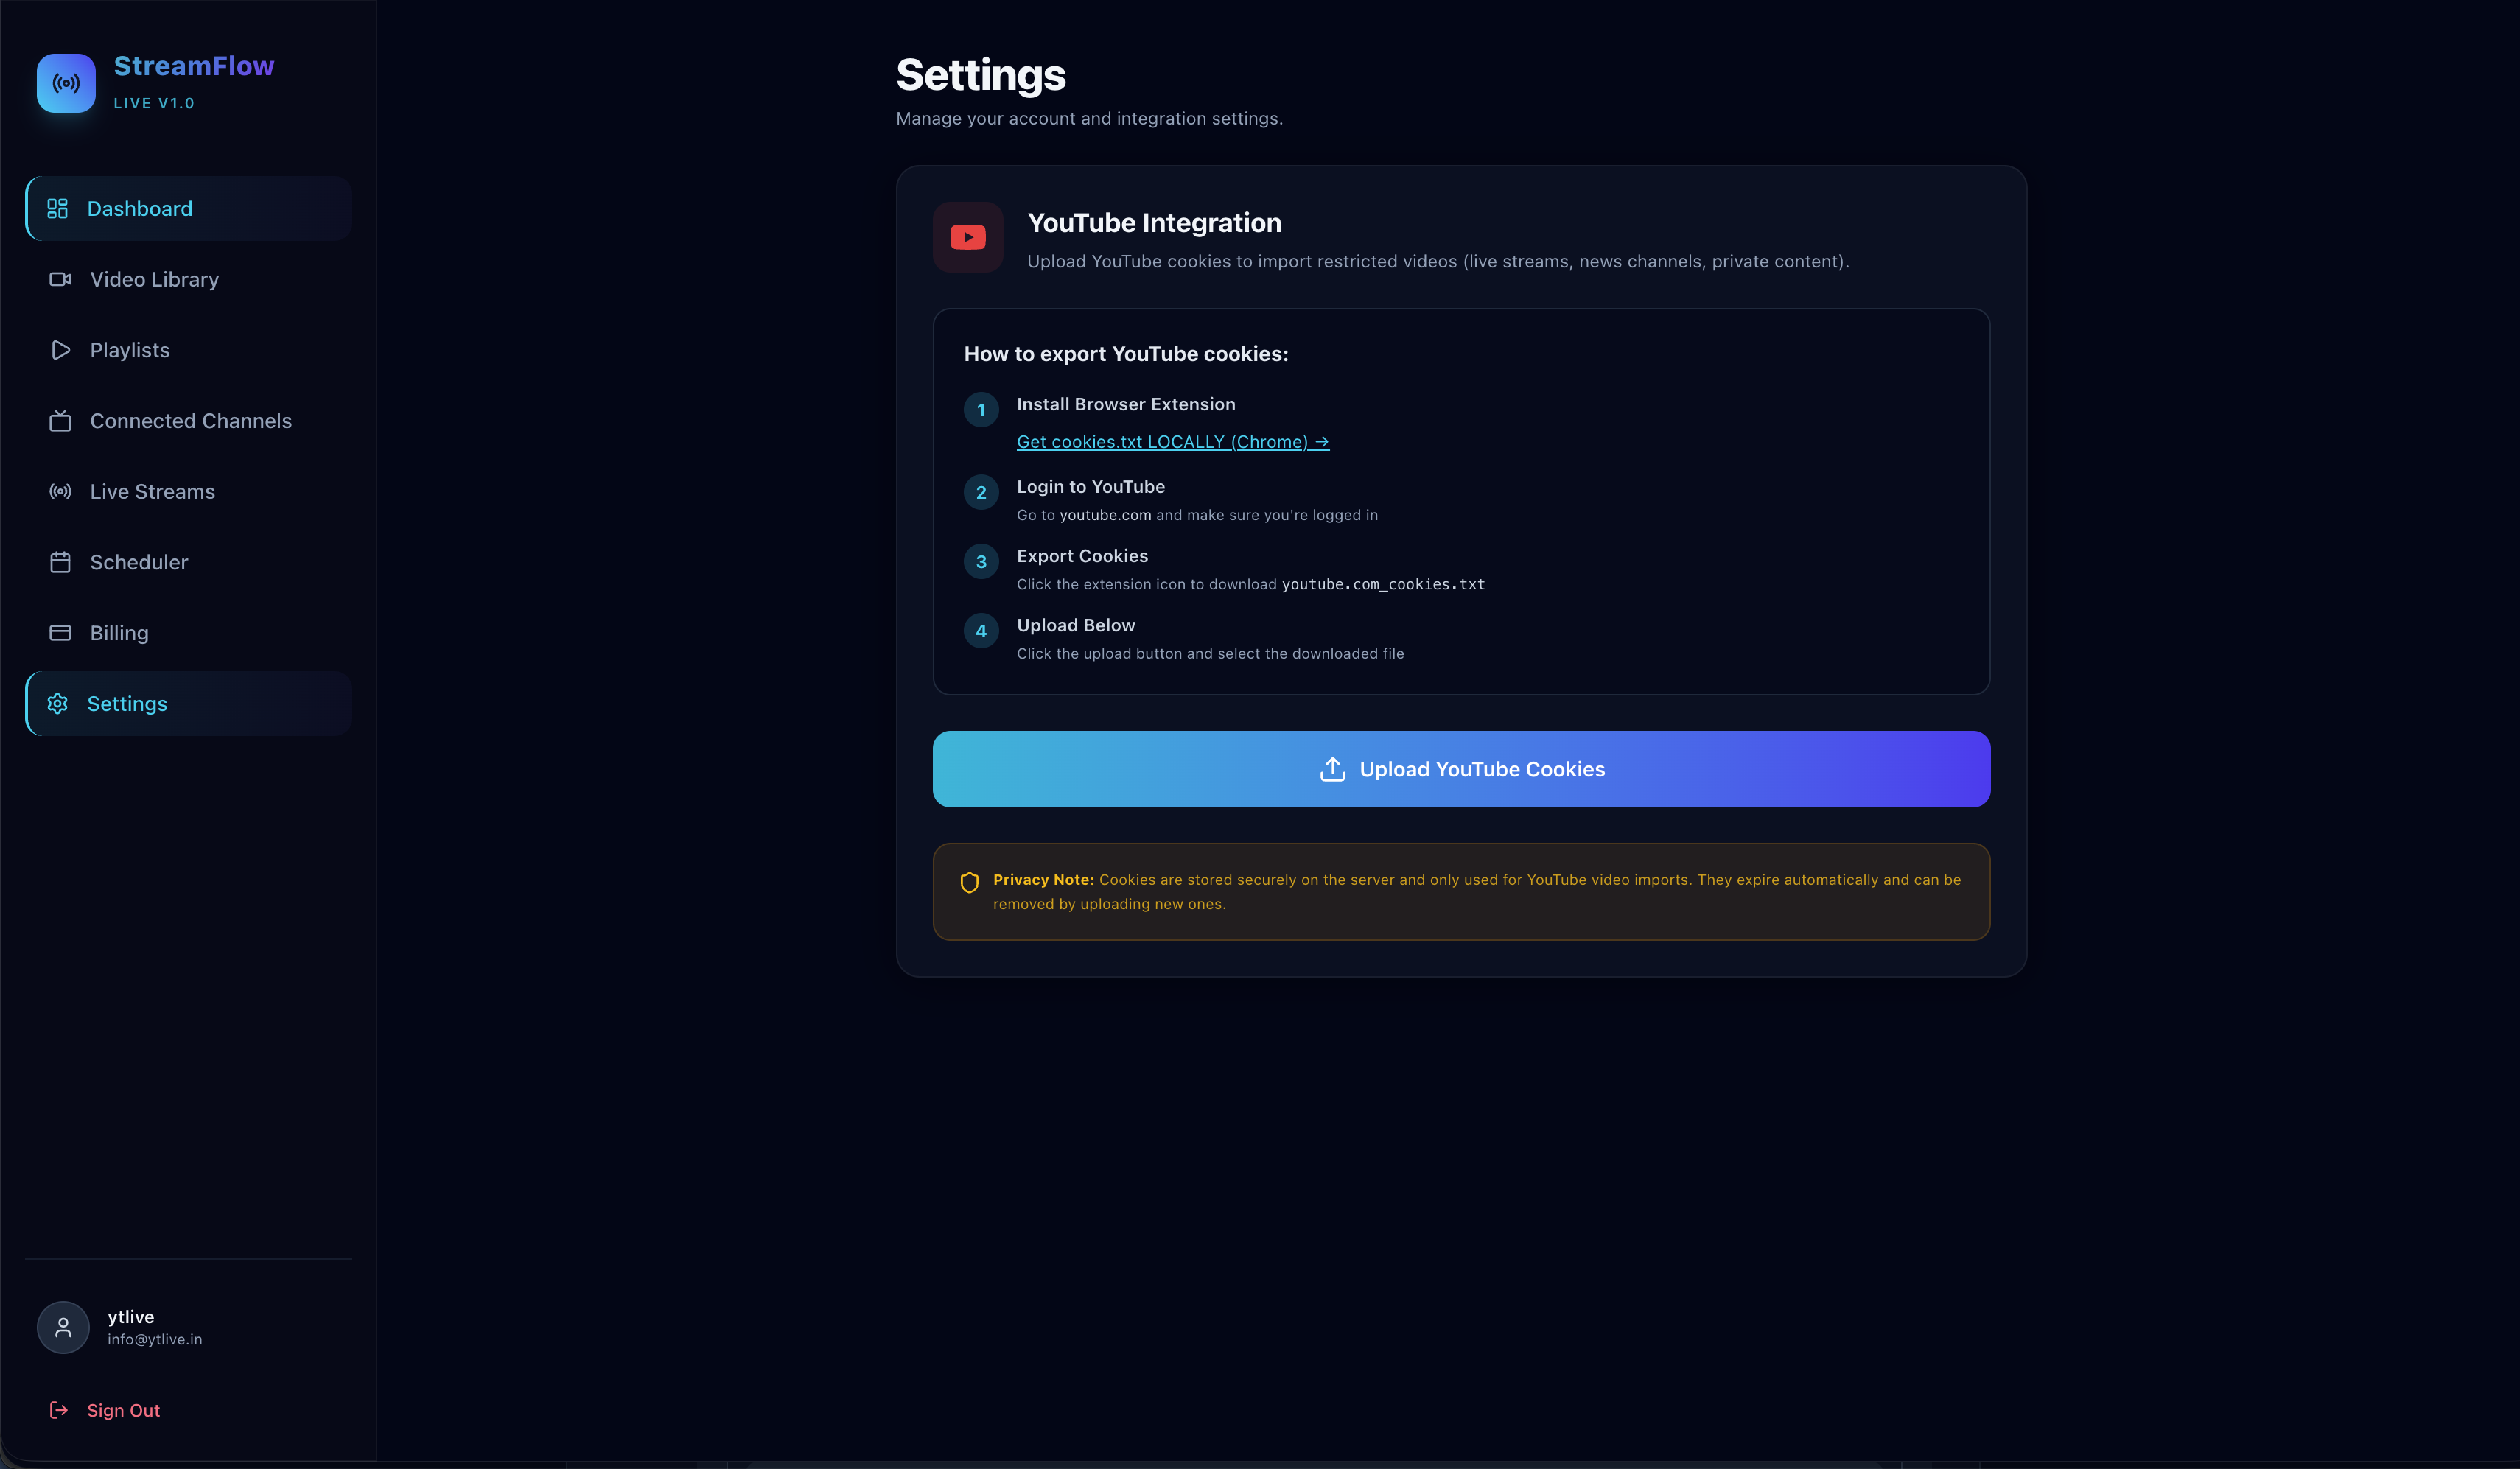
πŸ“ Note: Visual screenshots from the actual YtLive Stream application are shown throughout this guide to help you understand each step.

Streaming Workflow Overview

1. Create Account
2. Add Videos
3. Create Playlists
4. Connect YouTube
5. Start Streaming
6. Schedule (Optional)

Complete all steps to start 24/7 automated live streaming to YouTube

1

Account Creation & Setup

Get started with your YtLive Stream account

1.1

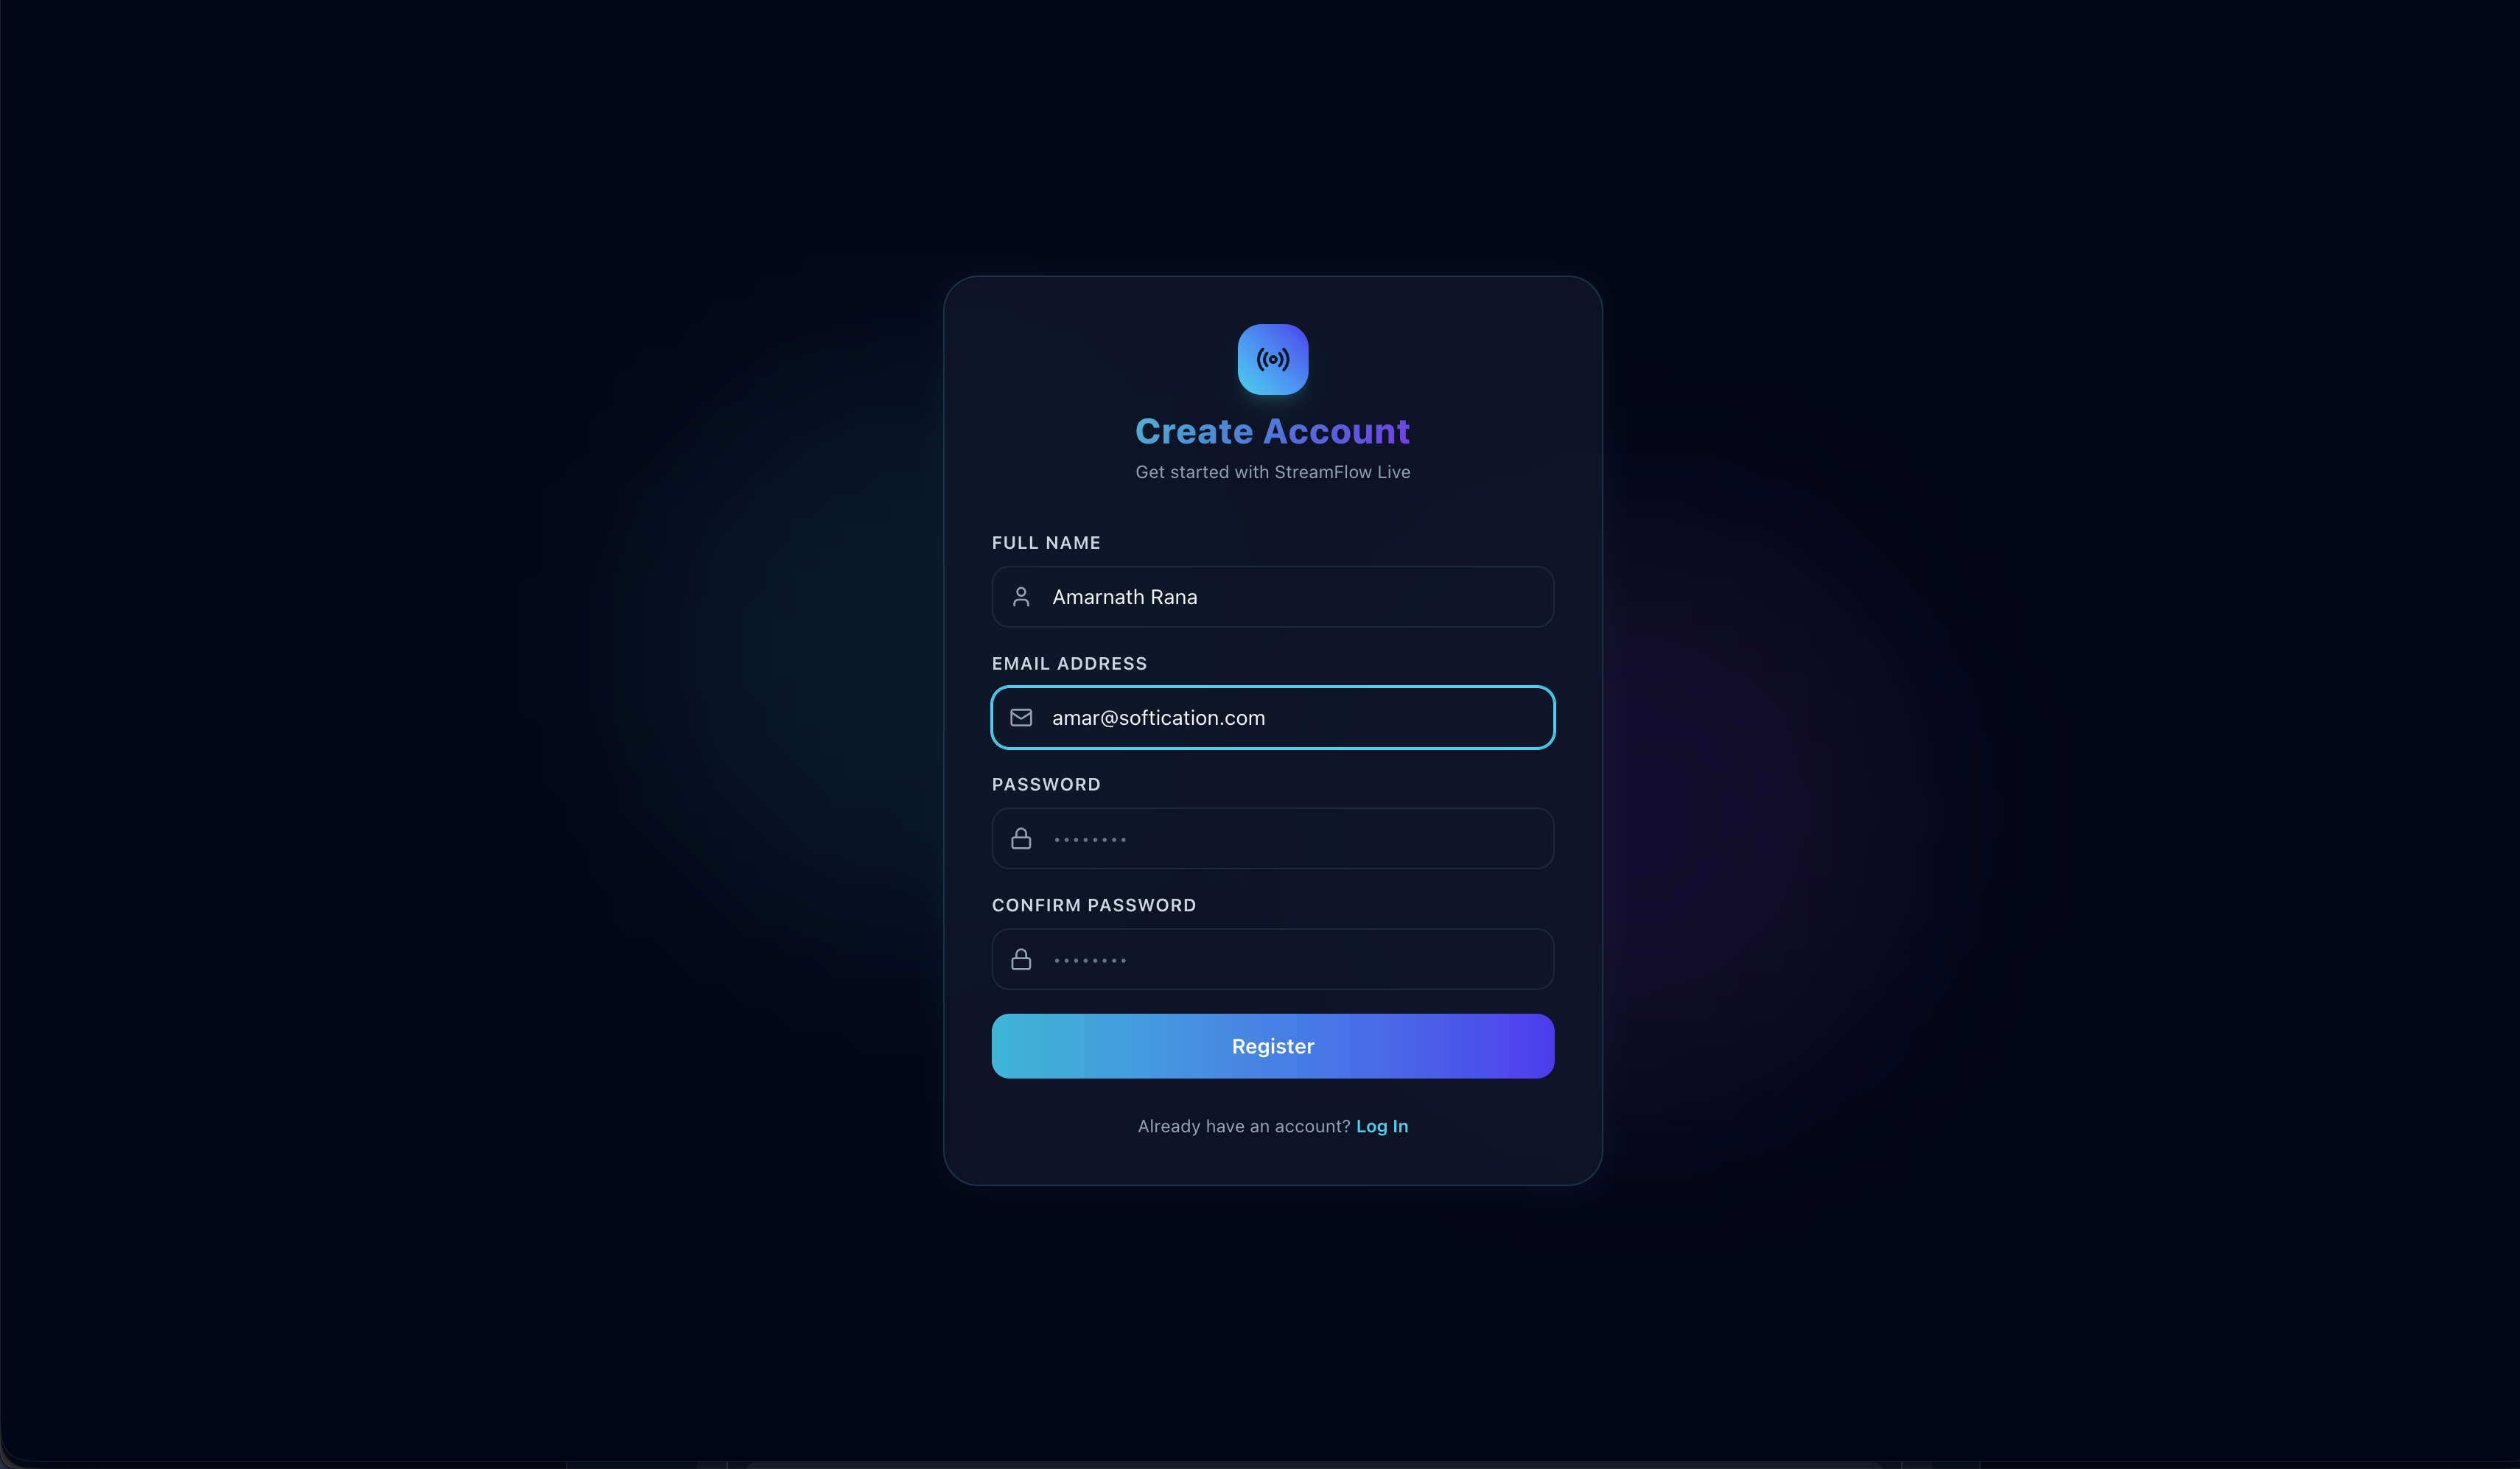
Register Your Account

Create your YtLive Stream account to access all streaming features.

Steps:

  • β†’ Visit app.ytlive.in/dashboard/register
  • β†’ Enter your full name and valid email address
  • β†’ Create a strong password (minimum 8 characters)
  • β†’ Click "Register" to create your account
  • β†’ Check your email for verification link (if required)

πŸ“Έ Screen Example: Registration Form

Registration Form
1.2

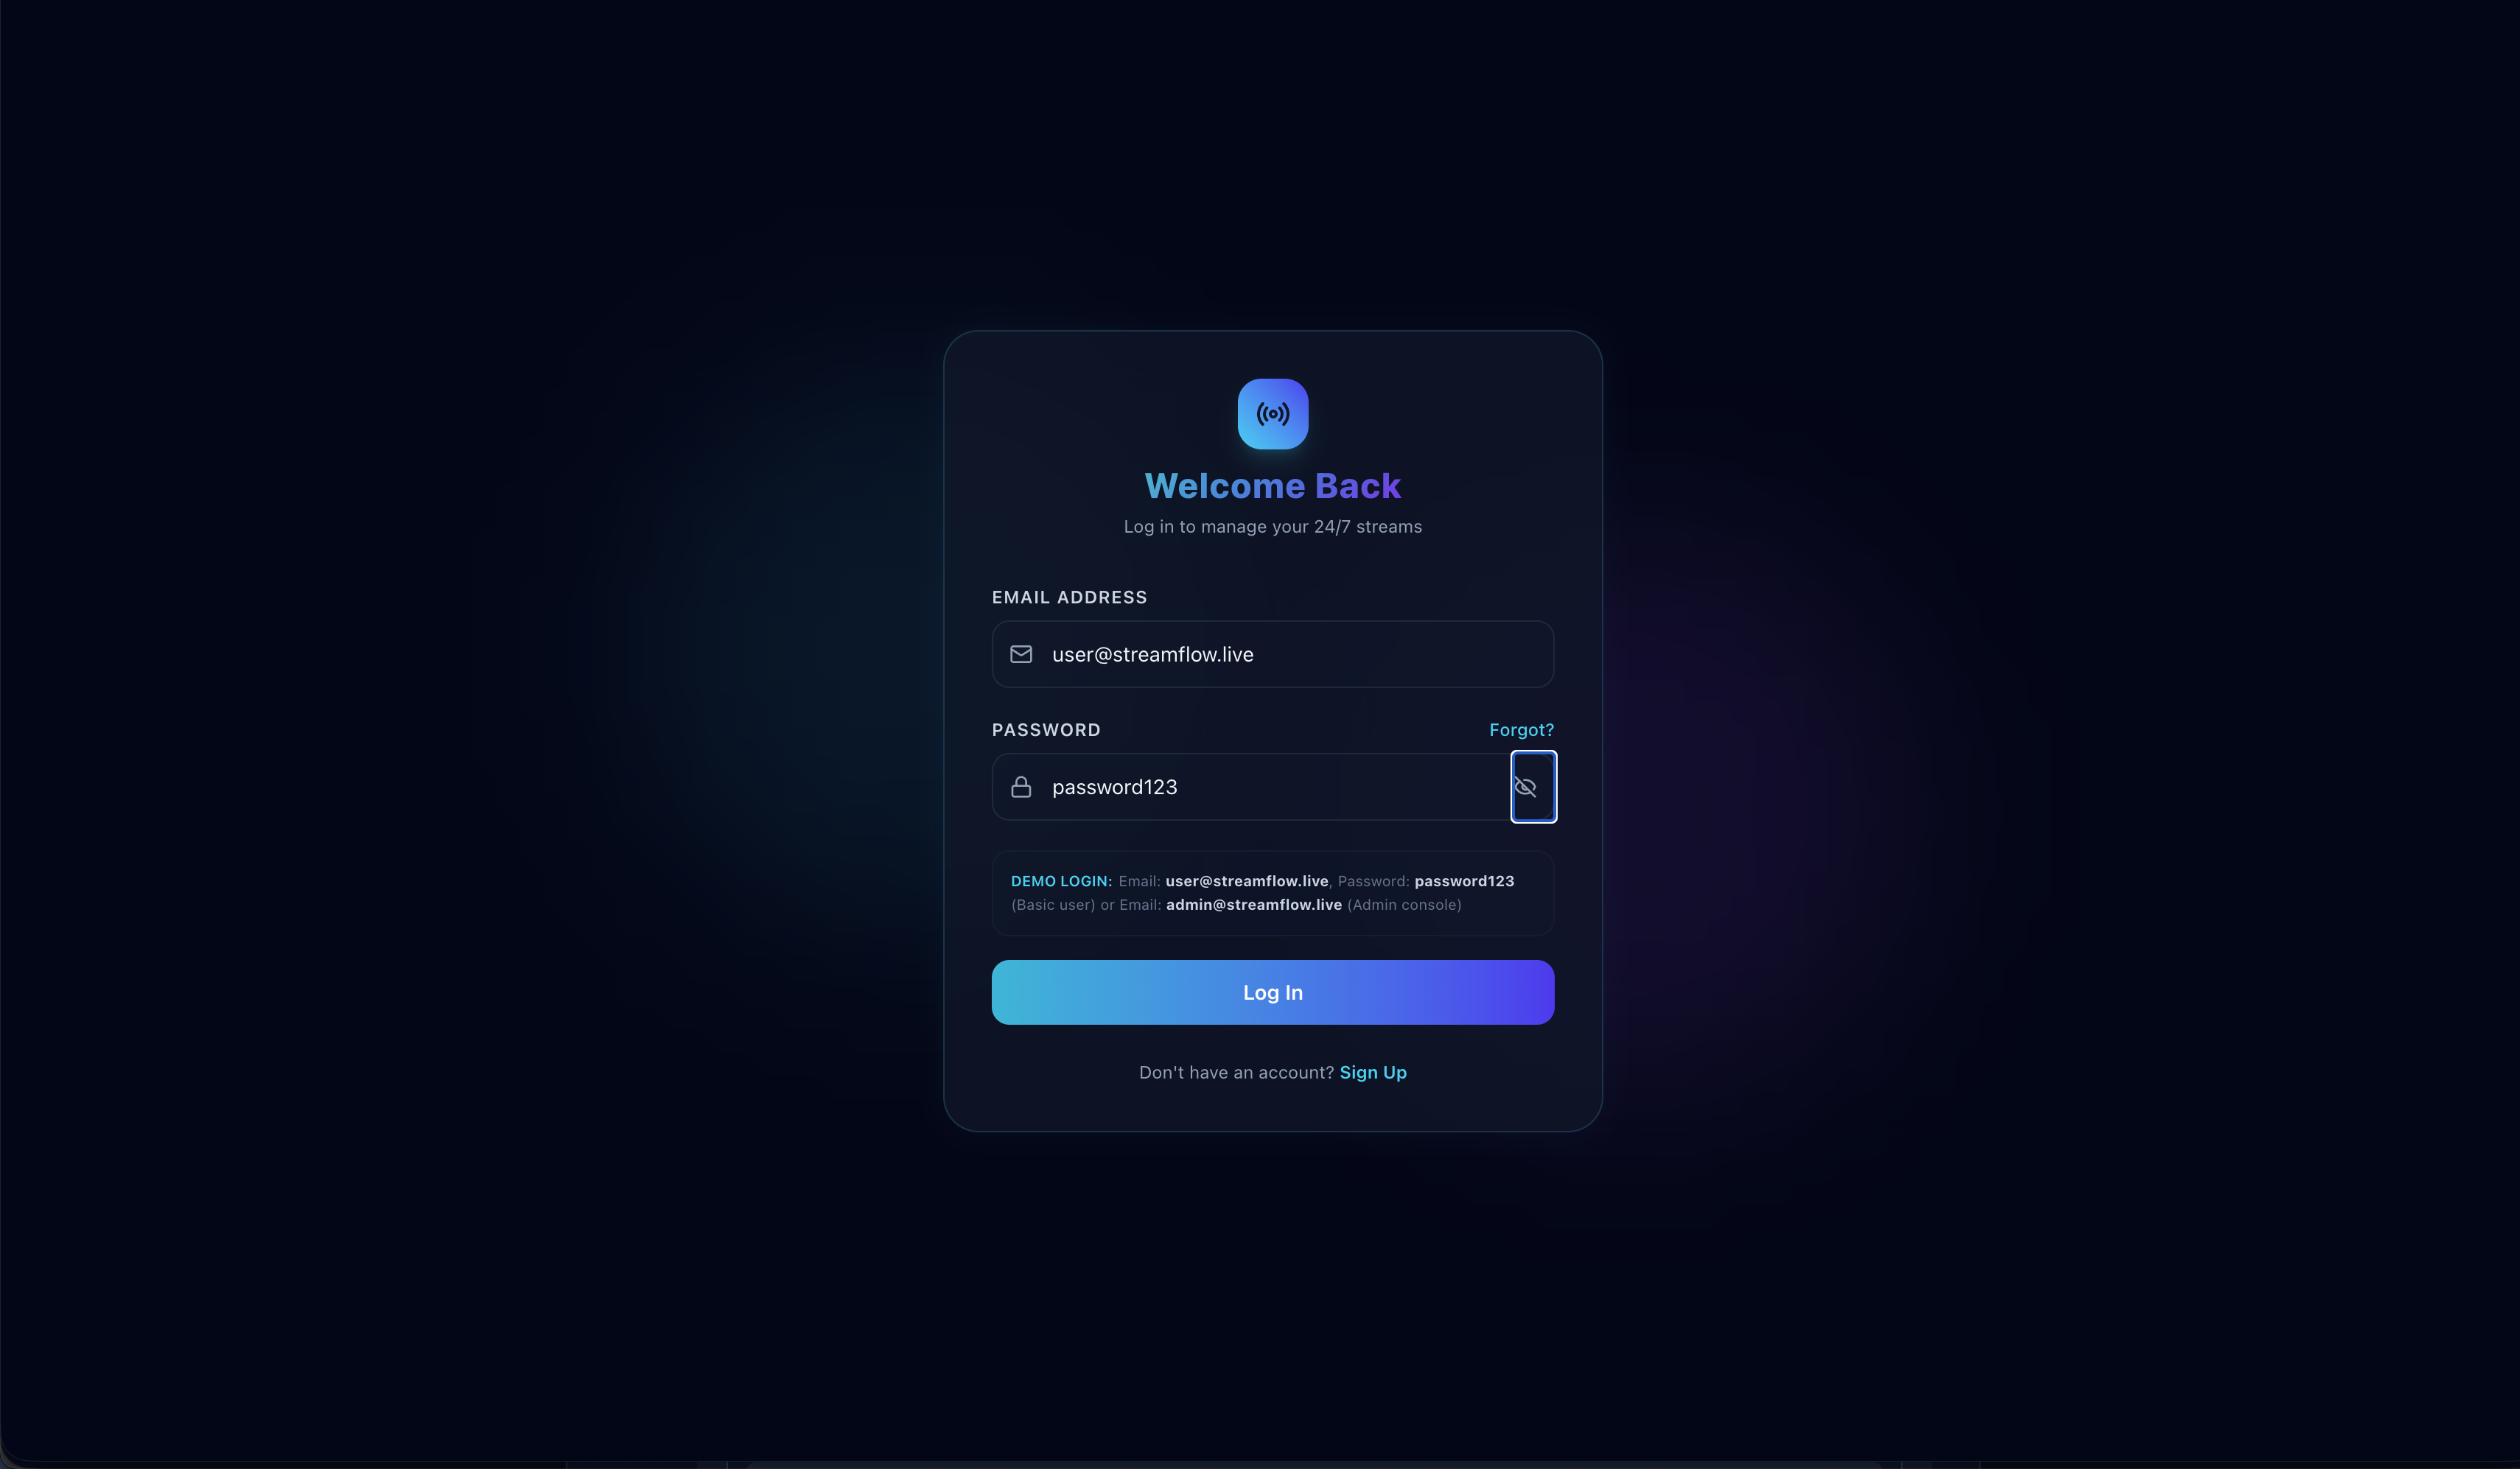
Log In to Your Dashboard

Access your streaming control panel.

Steps:

πŸ“Έ Screen Example: Login Page

Login Page

πŸ’‘ Tip: Bookmark your dashboard URL for quick access. You'll use it frequently to manage streams.

1.3

Choose Your Subscription Plan

Select a plan that fits your streaming needs.

Available Plans:

  • β€’ Starter: 1 channel, basic features - Perfect for beginners
  • β€’ Pro: Multiple channels, advanced scheduling - For growing creators
  • β€’ Business: Unlimited channels, priority support - For professionals
  • β€’ Navigate to Billing section to upgrade or manage your subscription
2

Video Library Management

Add and organize your video content

2.1

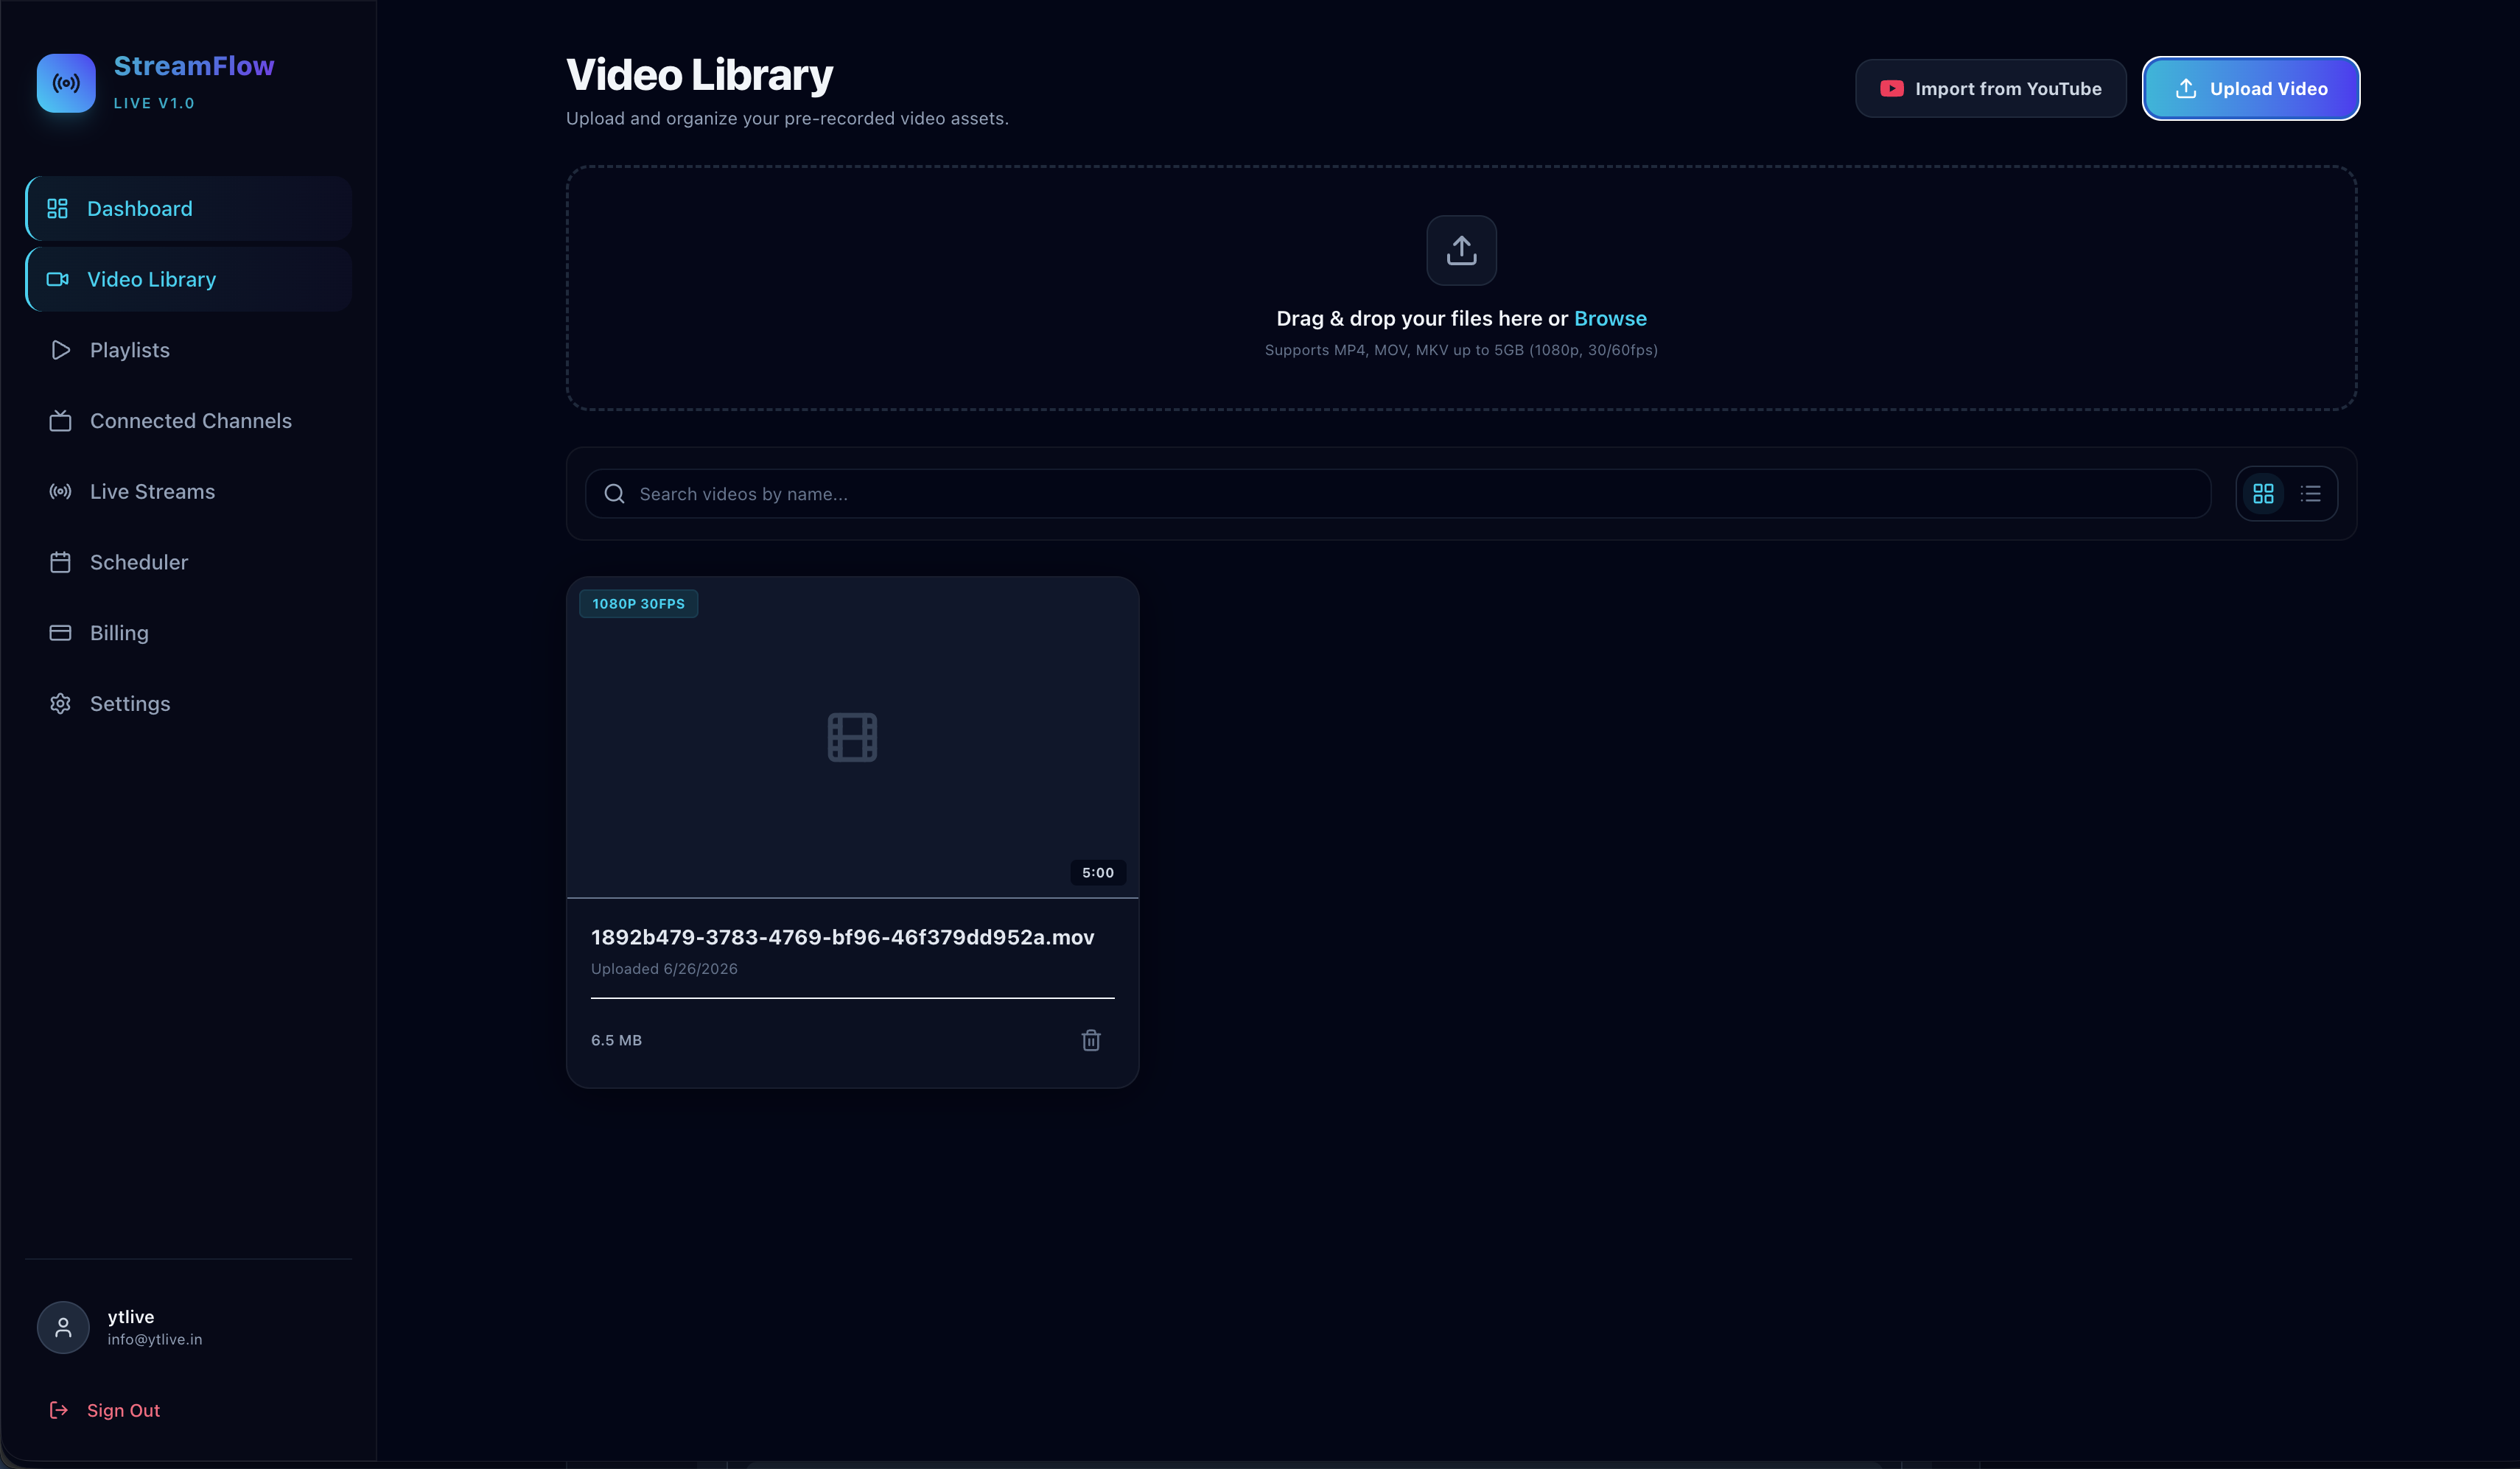
Access Video Library

Navigate to your video library from the dashboard.

Steps:

  • β†’ From your dashboard, click on "Video Library" in the left sidebar
  • β†’ You'll see all your uploaded videos listed here
  • β†’ Use the search bar to find specific videos

πŸ“Έ Screen Example: Video Library

Video Library
2.2

Add Videos to Library

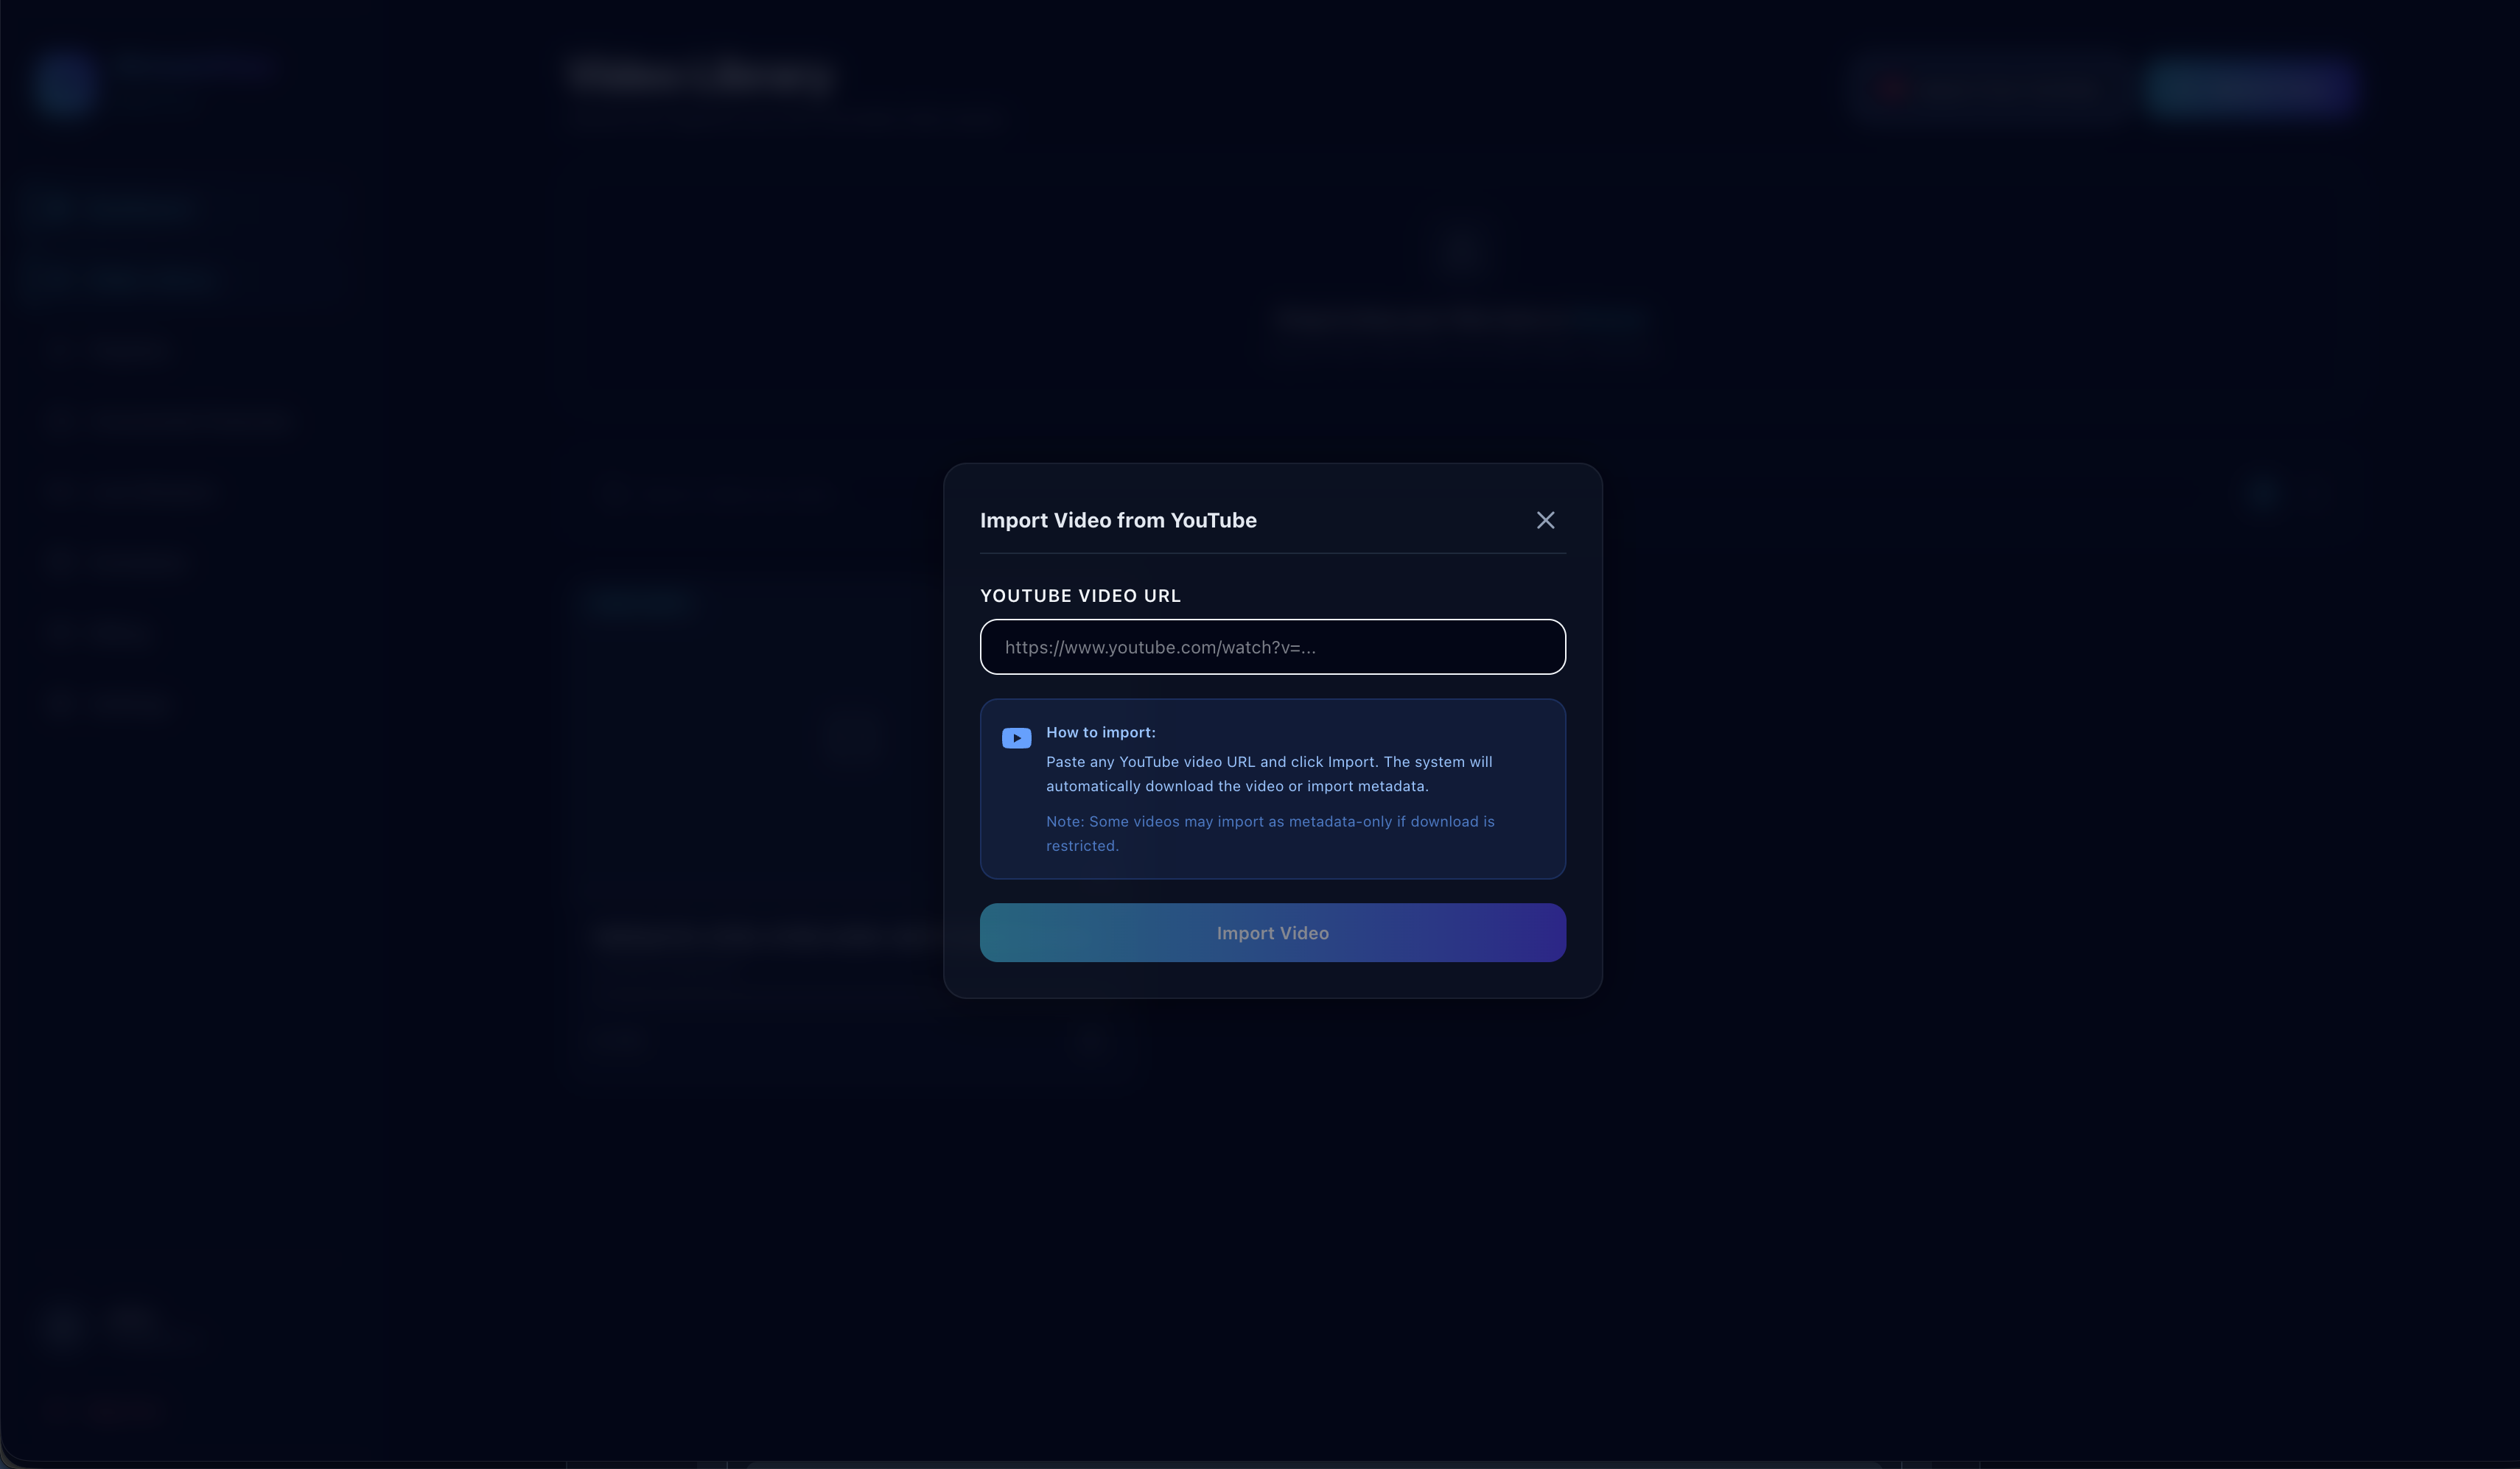
Import videos from YouTube or upload directly.

Method 1: Import from YouTube (Recommended)

  • β†’ Click "Add Video" or "Import from YouTube" button
  • β†’ Paste the YouTube video URL in the input field
  • β†’ Click "Import" - the system will automatically fetch video metadata
  • β†’ Wait for processing to complete (usually 1-3 minutes)

Method 2: Direct Upload

  • β†’ Click "Upload Video" button
  • β†’ Select video file from your computer (MP4, MOV, AVI supported)
  • β†’ Add title, description, and tags
  • β†’ Click "Upload" and wait for processing

πŸ“Έ Screen Example: Add Video Modal

Add Video

ℹ️ Note: Imported YouTube videos are processed automatically. If direct download fails, the system will fallback to metadata-only mode using YouTube's oEmbed API.

2.3

Manage Your Videos

Edit, delete, and organize videos in your library.

Available Actions:

  • ✏️ Edit: Update video title, description, or thumbnail
  • πŸ‘οΈ Preview: Watch video before adding to playlists
  • πŸ“Š Details: View video duration, resolution, and file size
  • πŸ—‘οΈ Delete: Remove videos you no longer need (irreversible)
3

Playlist Management

Create and organize video playlists for streaming

3.1

Create a New Playlist

Organize your videos into themed playlists.

Steps:

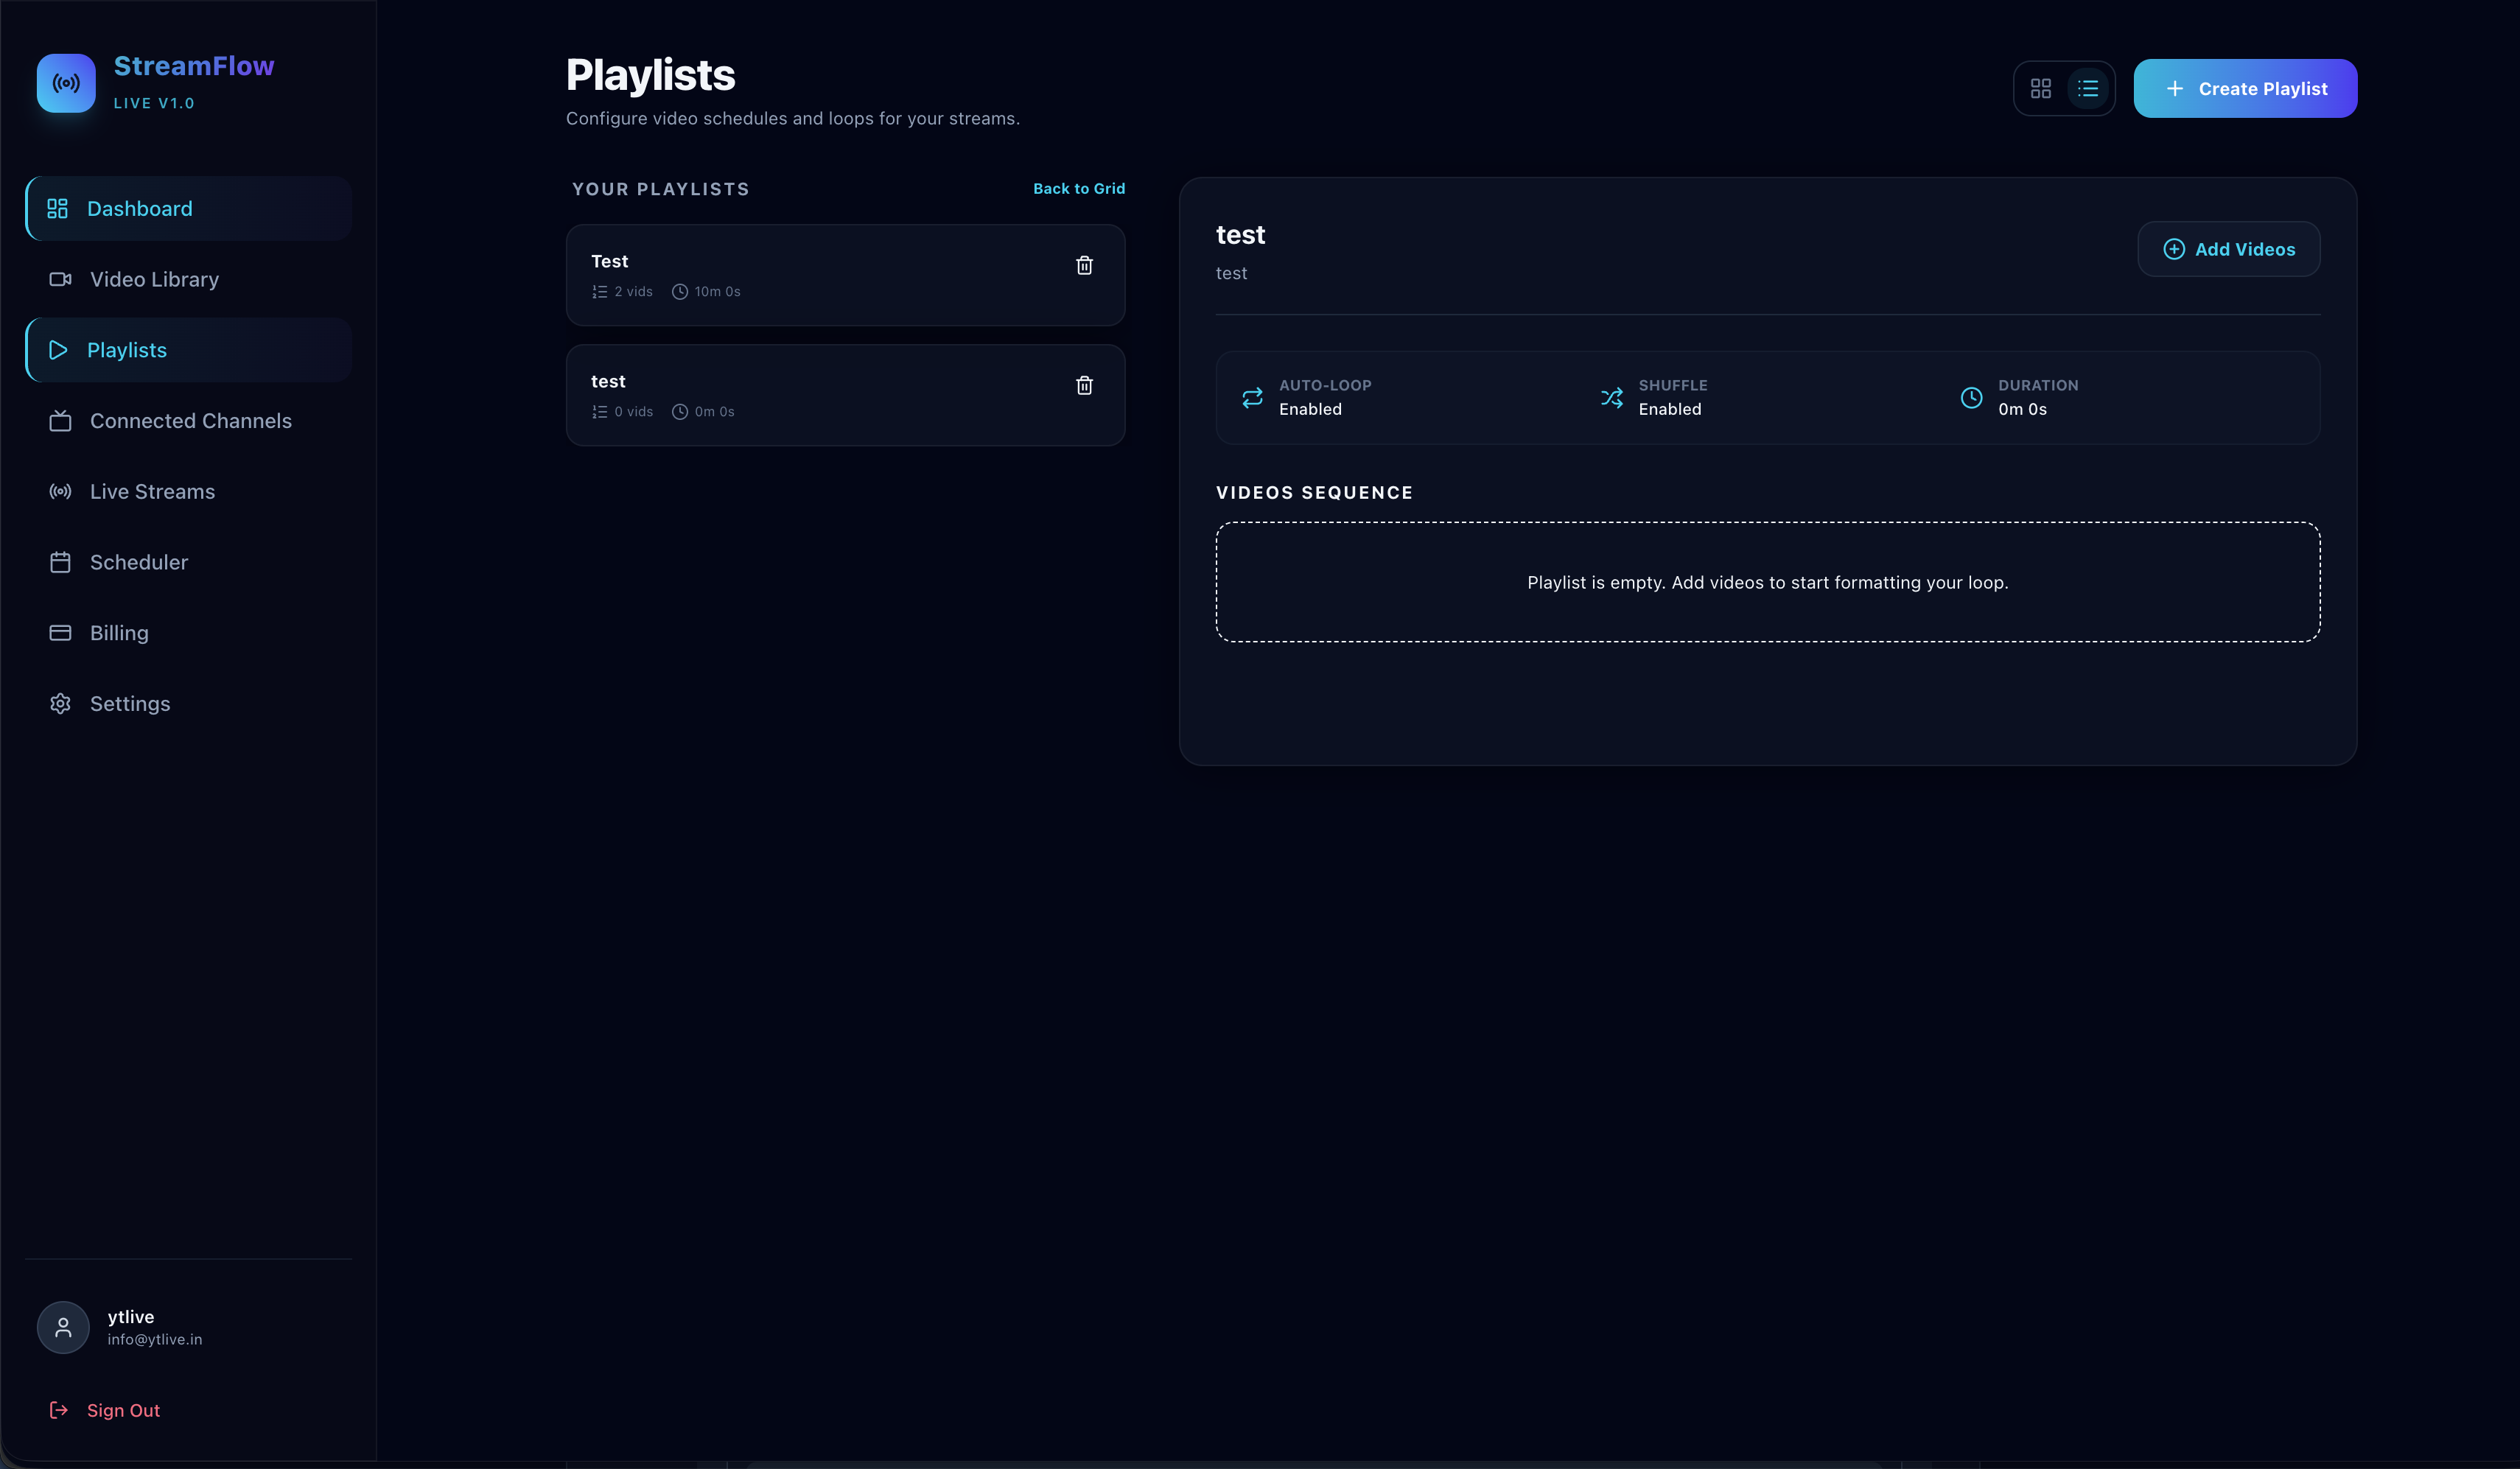
  • β†’ From dashboard, click on "Playlists" in the left sidebar
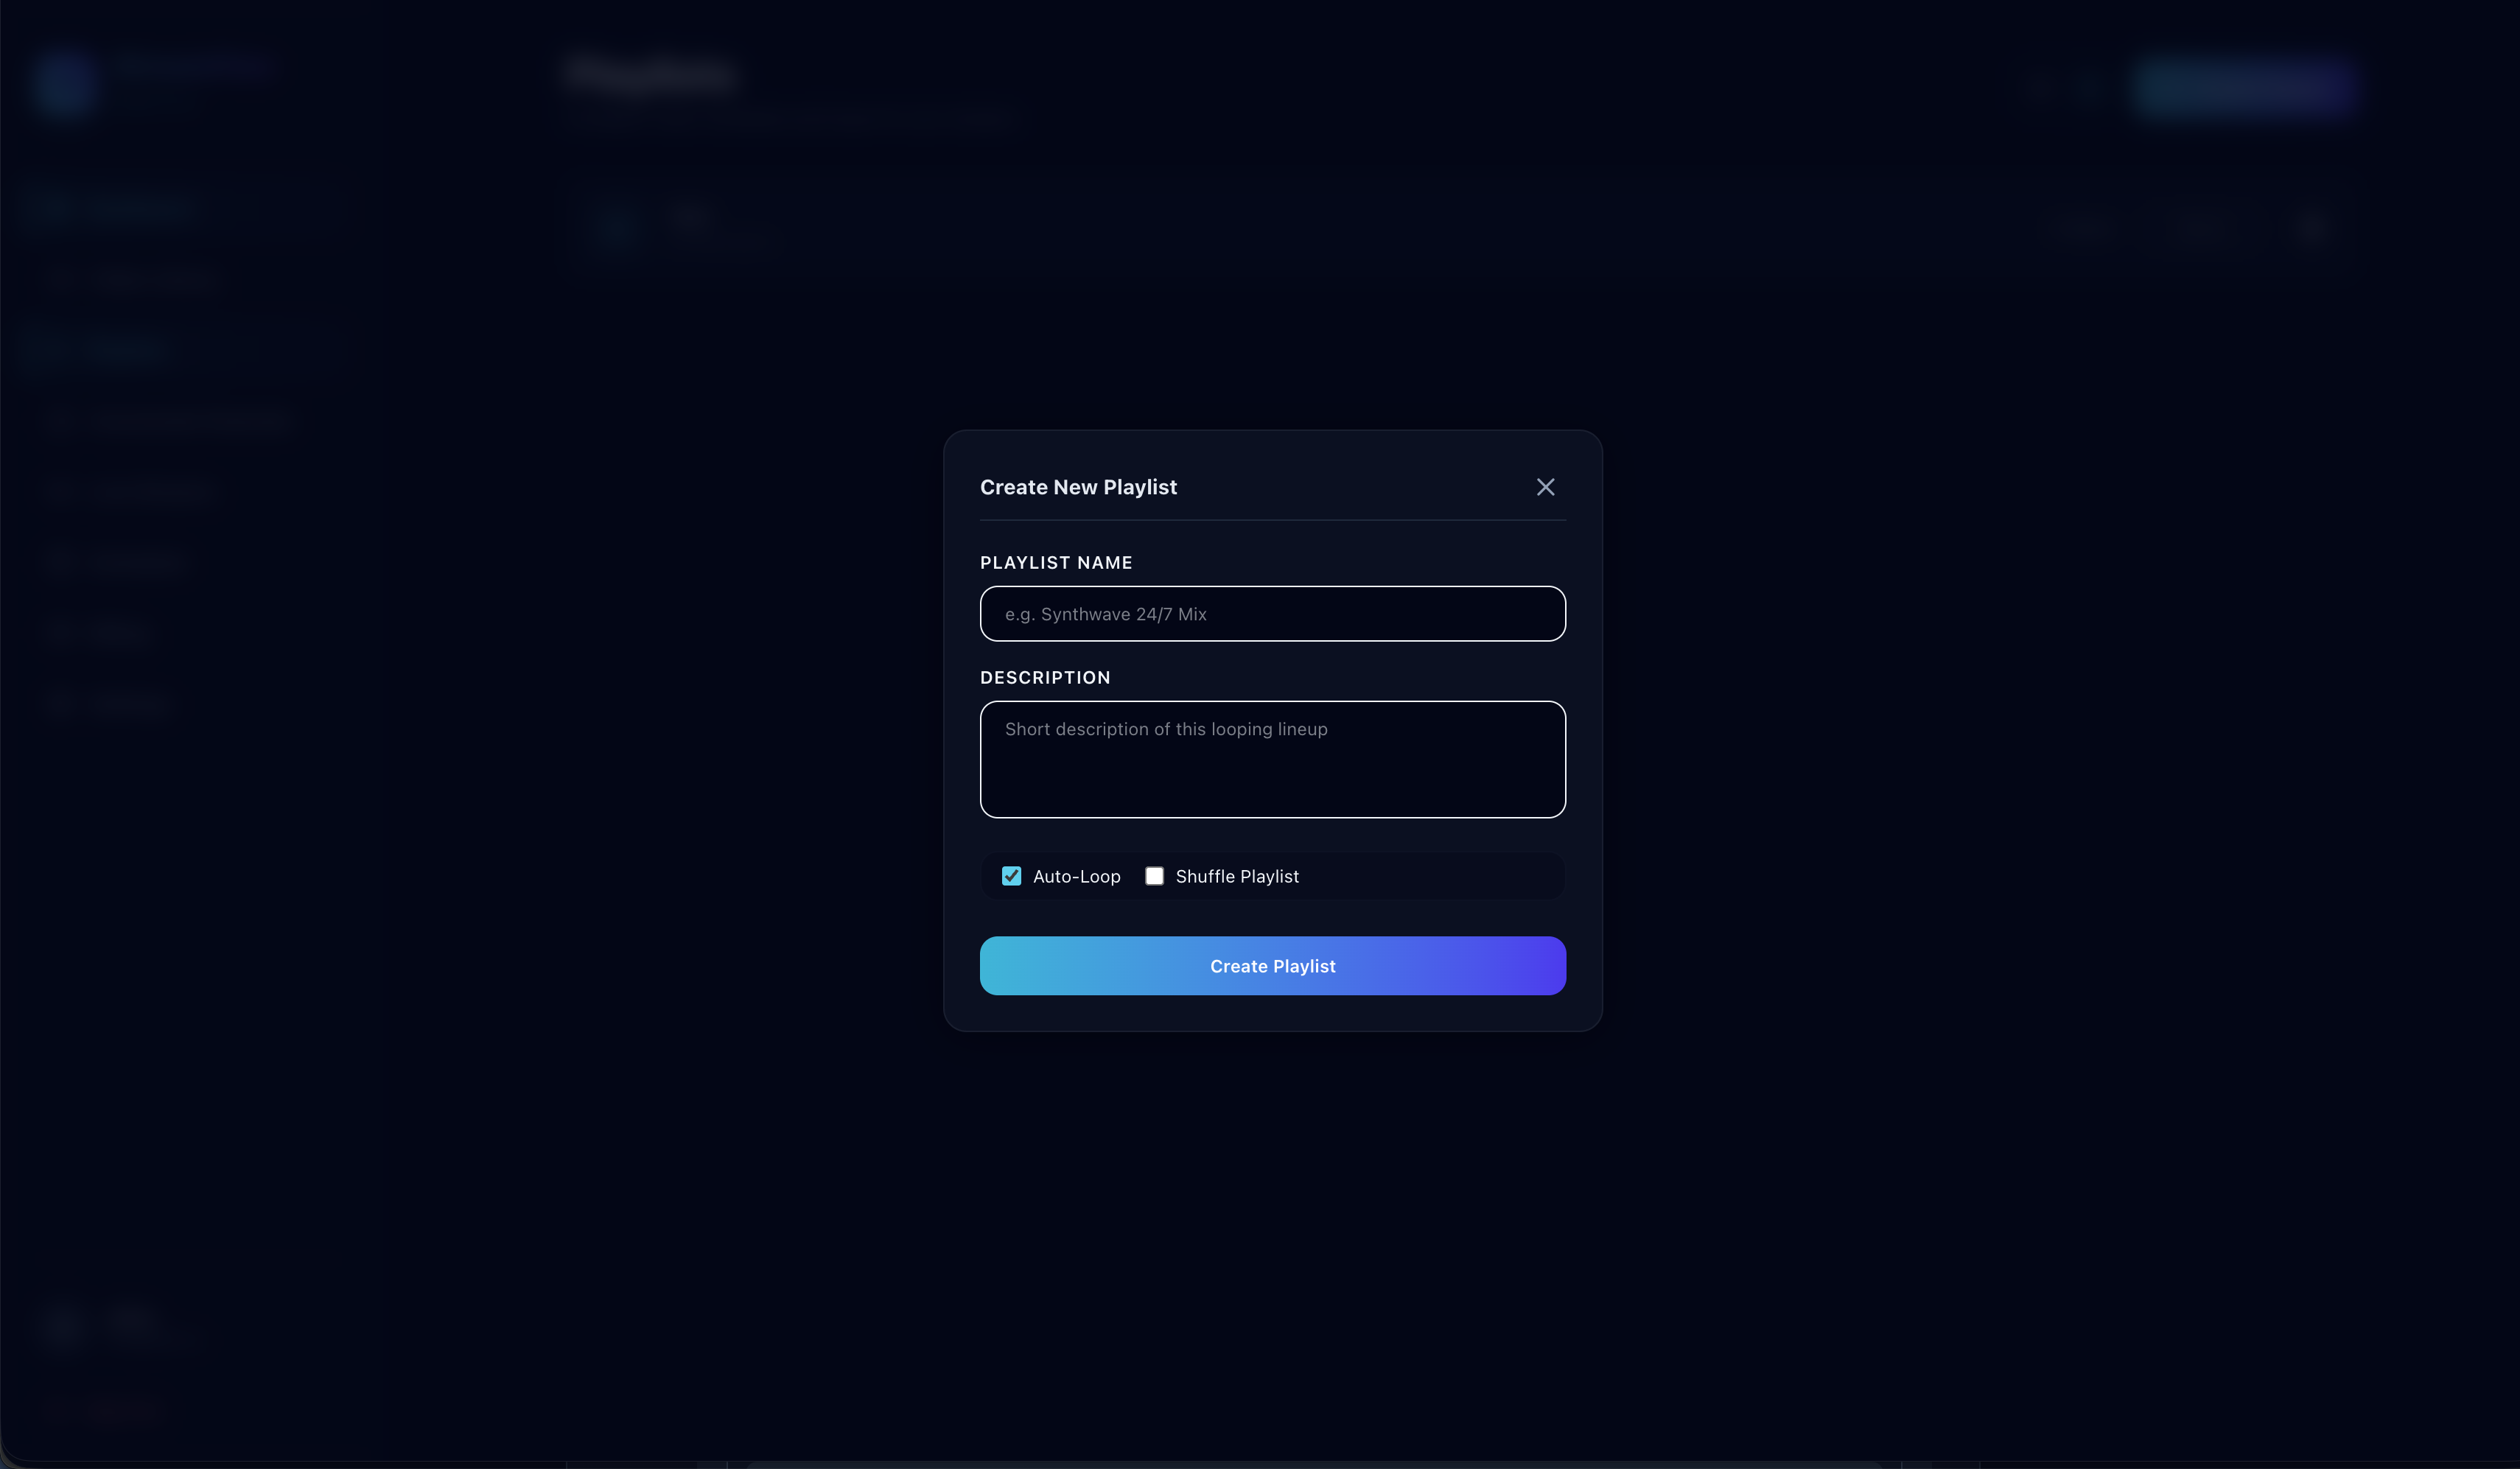
  • β†’ Click "Create New Playlist" button
  • β†’ Enter playlist name (e.g., "Morning Shows", "Music Mix", "Tutorial Series")
  • β†’ Add description (optional but recommended)
  • β†’ Choose playlist settings:
    • β€’ Loop: Repeat playlist continuously
    • β€’ Shuffle: Play videos in random order
    • β€’ Sequential: Play videos in added order
  • β†’ Click "Create Playlist"

πŸ“Έ Screen Example: Create Playlist Form

Create Playlist
3.2

Add Videos to Playlist

Populate your playlist with videos from your library.

Steps:

  • β†’ Click on the playlist you want to edit
  • β†’ Click "Add Videos" or "Manage Videos" button
  • β†’ Browse or search your video library
  • β†’ Select videos by clicking on them (multi-select enabled)
  • β†’ Click "Add Selected Videos"
  • β†’ Drag and drop to reorder videos (if sequential mode)

πŸ“Έ Screen Example: Add Videos to Playlist

Add Videos to Playlist

πŸ’‘ Pro Tip: Create multiple playlists for different times of day or content themes. This makes scheduling much easier!

3.3

Edit & Manage Playlists

Modify playlist settings and content.

Management Options:

  • β†’ Rename: Click edit icon next to playlist name
  • β†’ Remove Videos: Click "X" on any video thumbnail
  • β†’ Change Order: Drag videos to rearrange
  • β†’ Duplicate: Clone playlist for similar content
  • β†’ Delete: Remove entire playlist (videos stay in library)
4

Connect YouTube Channels

Link your YouTube accounts for live streaming

4.1

Navigate to Channel Settings

Access the channel connection area.

Steps:

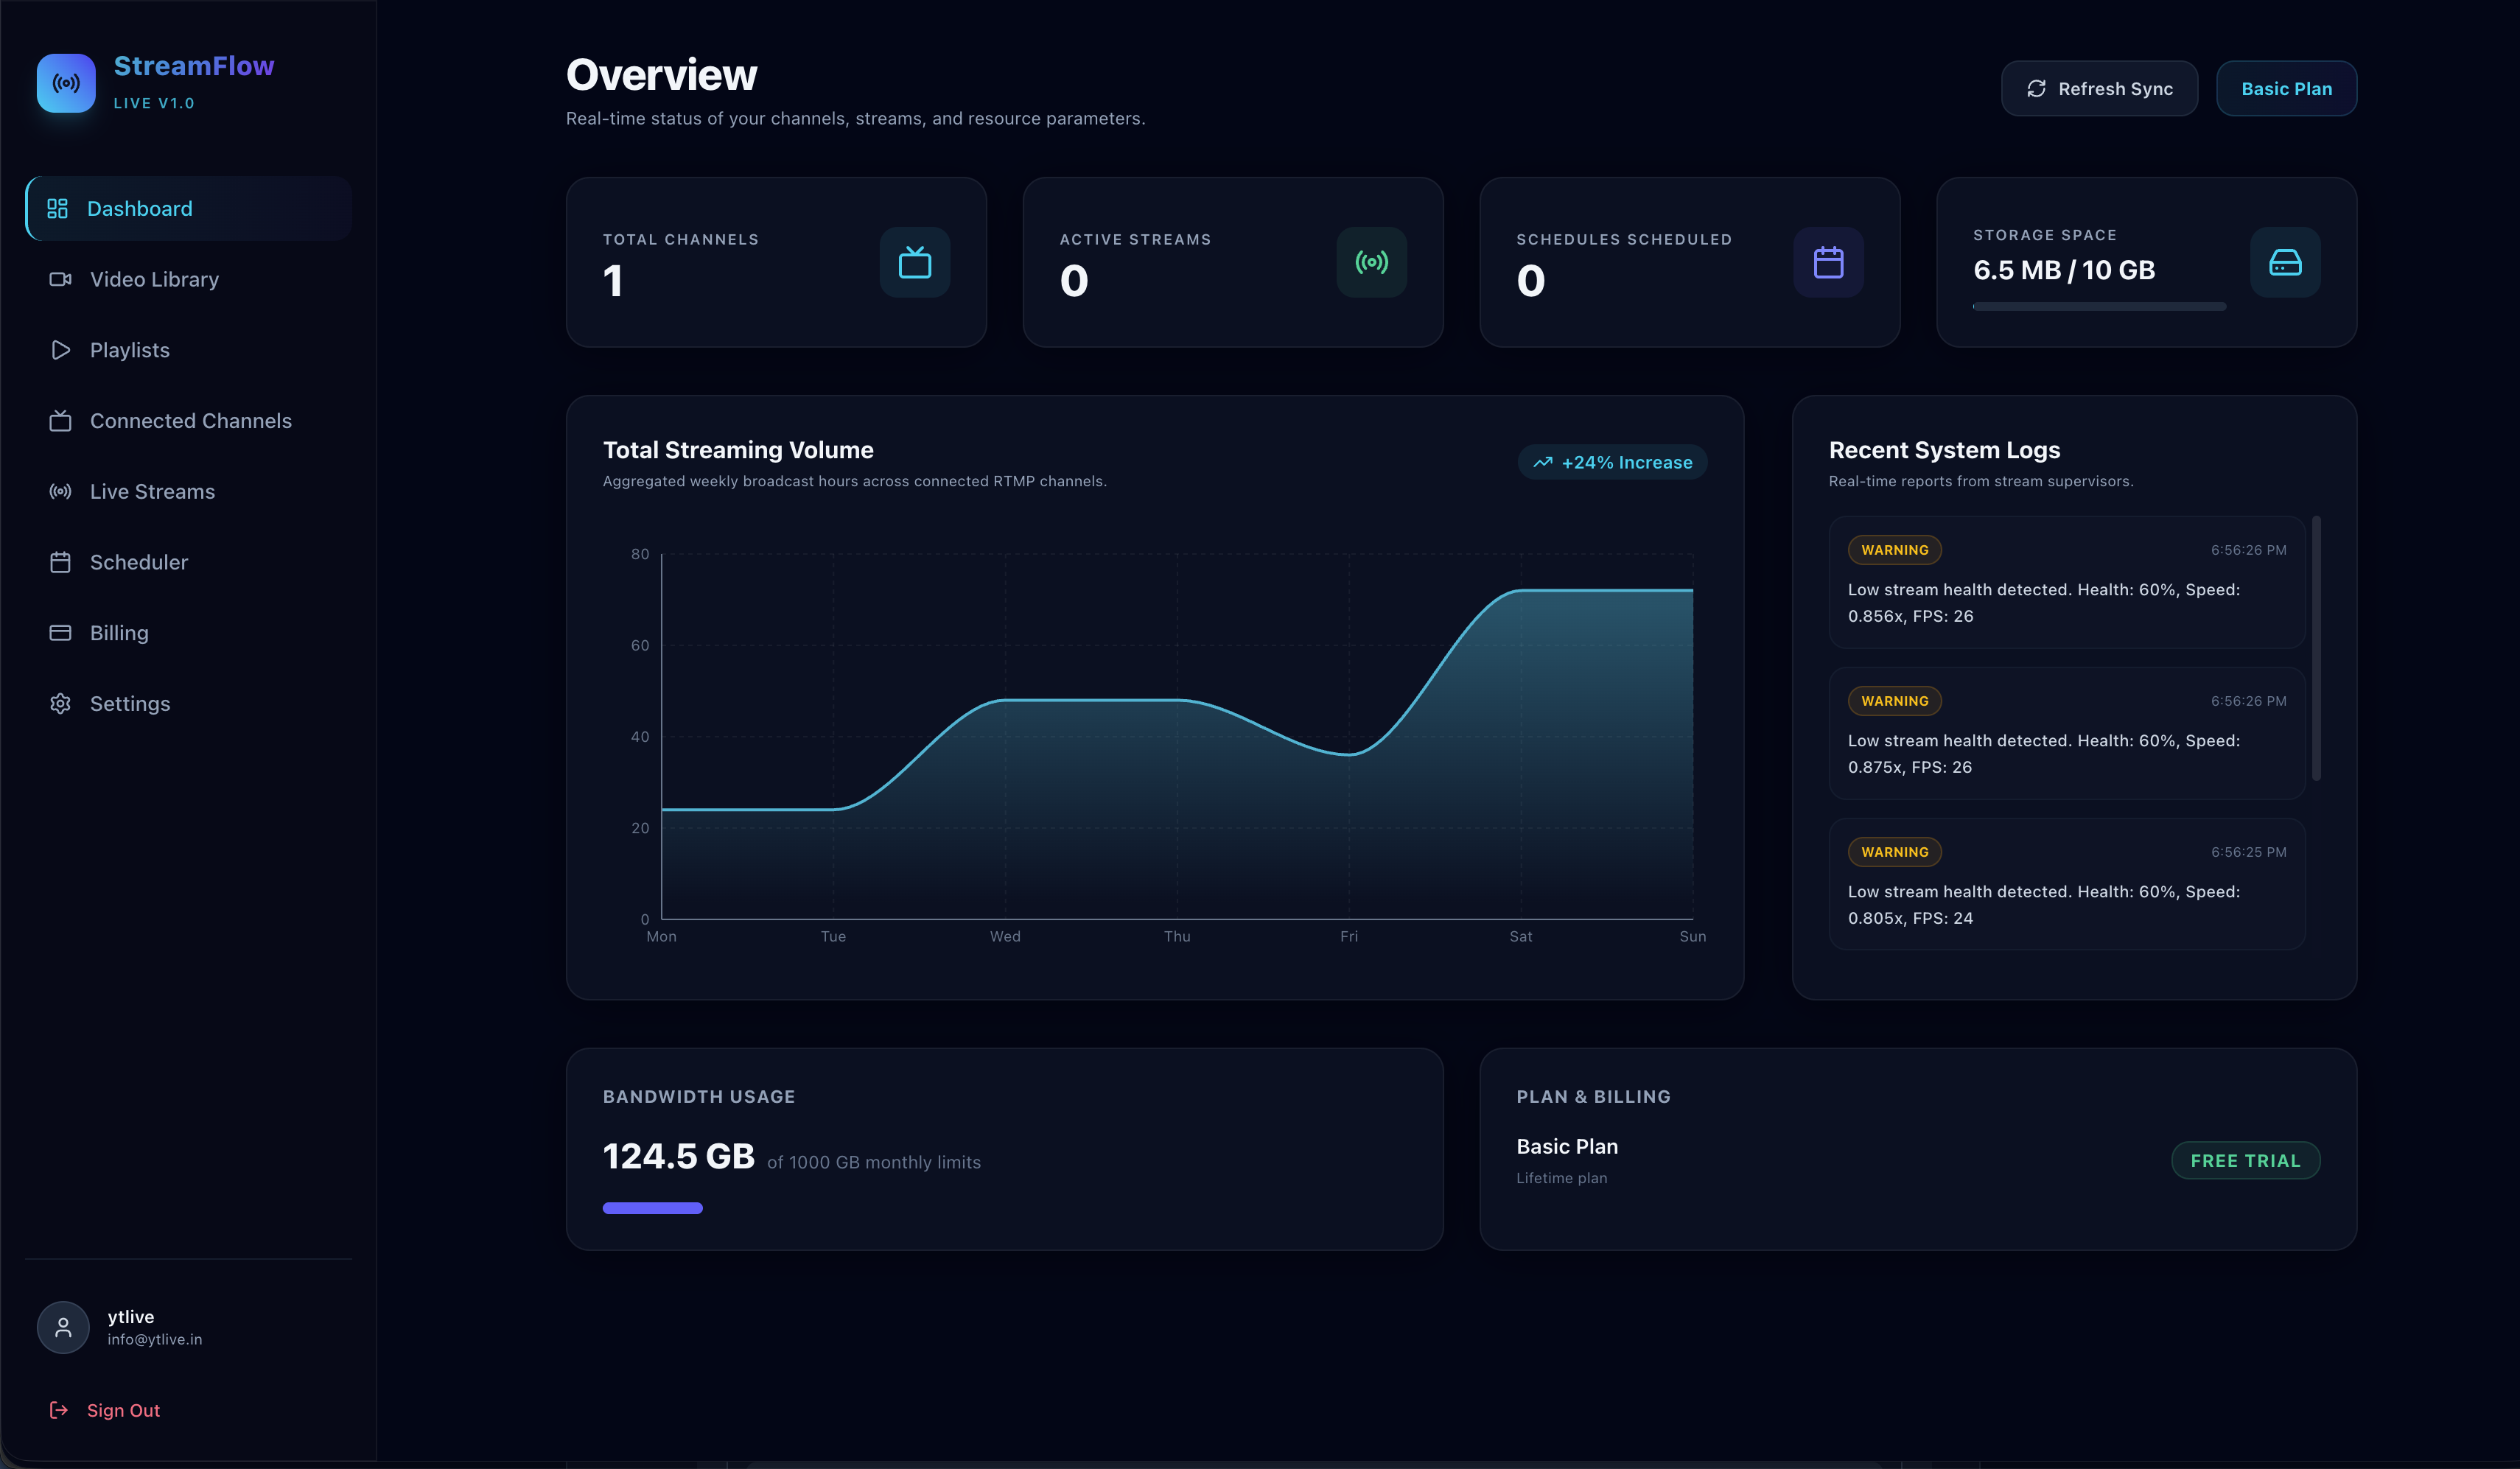
  • β†’ From dashboard, click on "Channels" in the left sidebar
  • β†’ Click "Connect Channel" or "Add YouTube Channel" button

πŸ“Έ Screen Example: Dashboard Overview

Dashboard
4.2

Authorize YouTube Access

Grant YtLive Stream permission to stream to your channel.

Steps:

  • β†’ Click "Connect with YouTube" button
  • β†’ You'll be redirected to Google's OAuth login page
  • β†’ Select the Google account associated with your YouTube channel
  • β†’ Review permissions requested:
    • β€’ Manage your YouTube videos
    • β€’ Upload videos to YouTube
    • β€’ Manage live streams
  • β†’ Click "Allow" to grant permissions
  • β†’ You'll be redirected back to YtLive Stream dashboard

πŸ“Έ Screen Example: Google OAuth Authorization

OAuth Authorization

⚠️ Important: Your YouTube channel must be verified and have live streaming enabled. New channels may require 24-hour verification period before first stream.

4.3

Manage Connected Channels

View and configure your connected YouTube channels.

Channel Management:

  • βœ“ View Status: See connection status (Active/Disconnected)
  • βœ“ Channel Details: View channel name, subscribers, and stream key
  • πŸ”„ Reconnect: Refresh OAuth token if connection expires
  • ❌ Disconnect: Remove channel access (can reconnect anytime)

βœ… Success! Your YouTube channel is now connected. You can start live streaming to this channel!

4.4

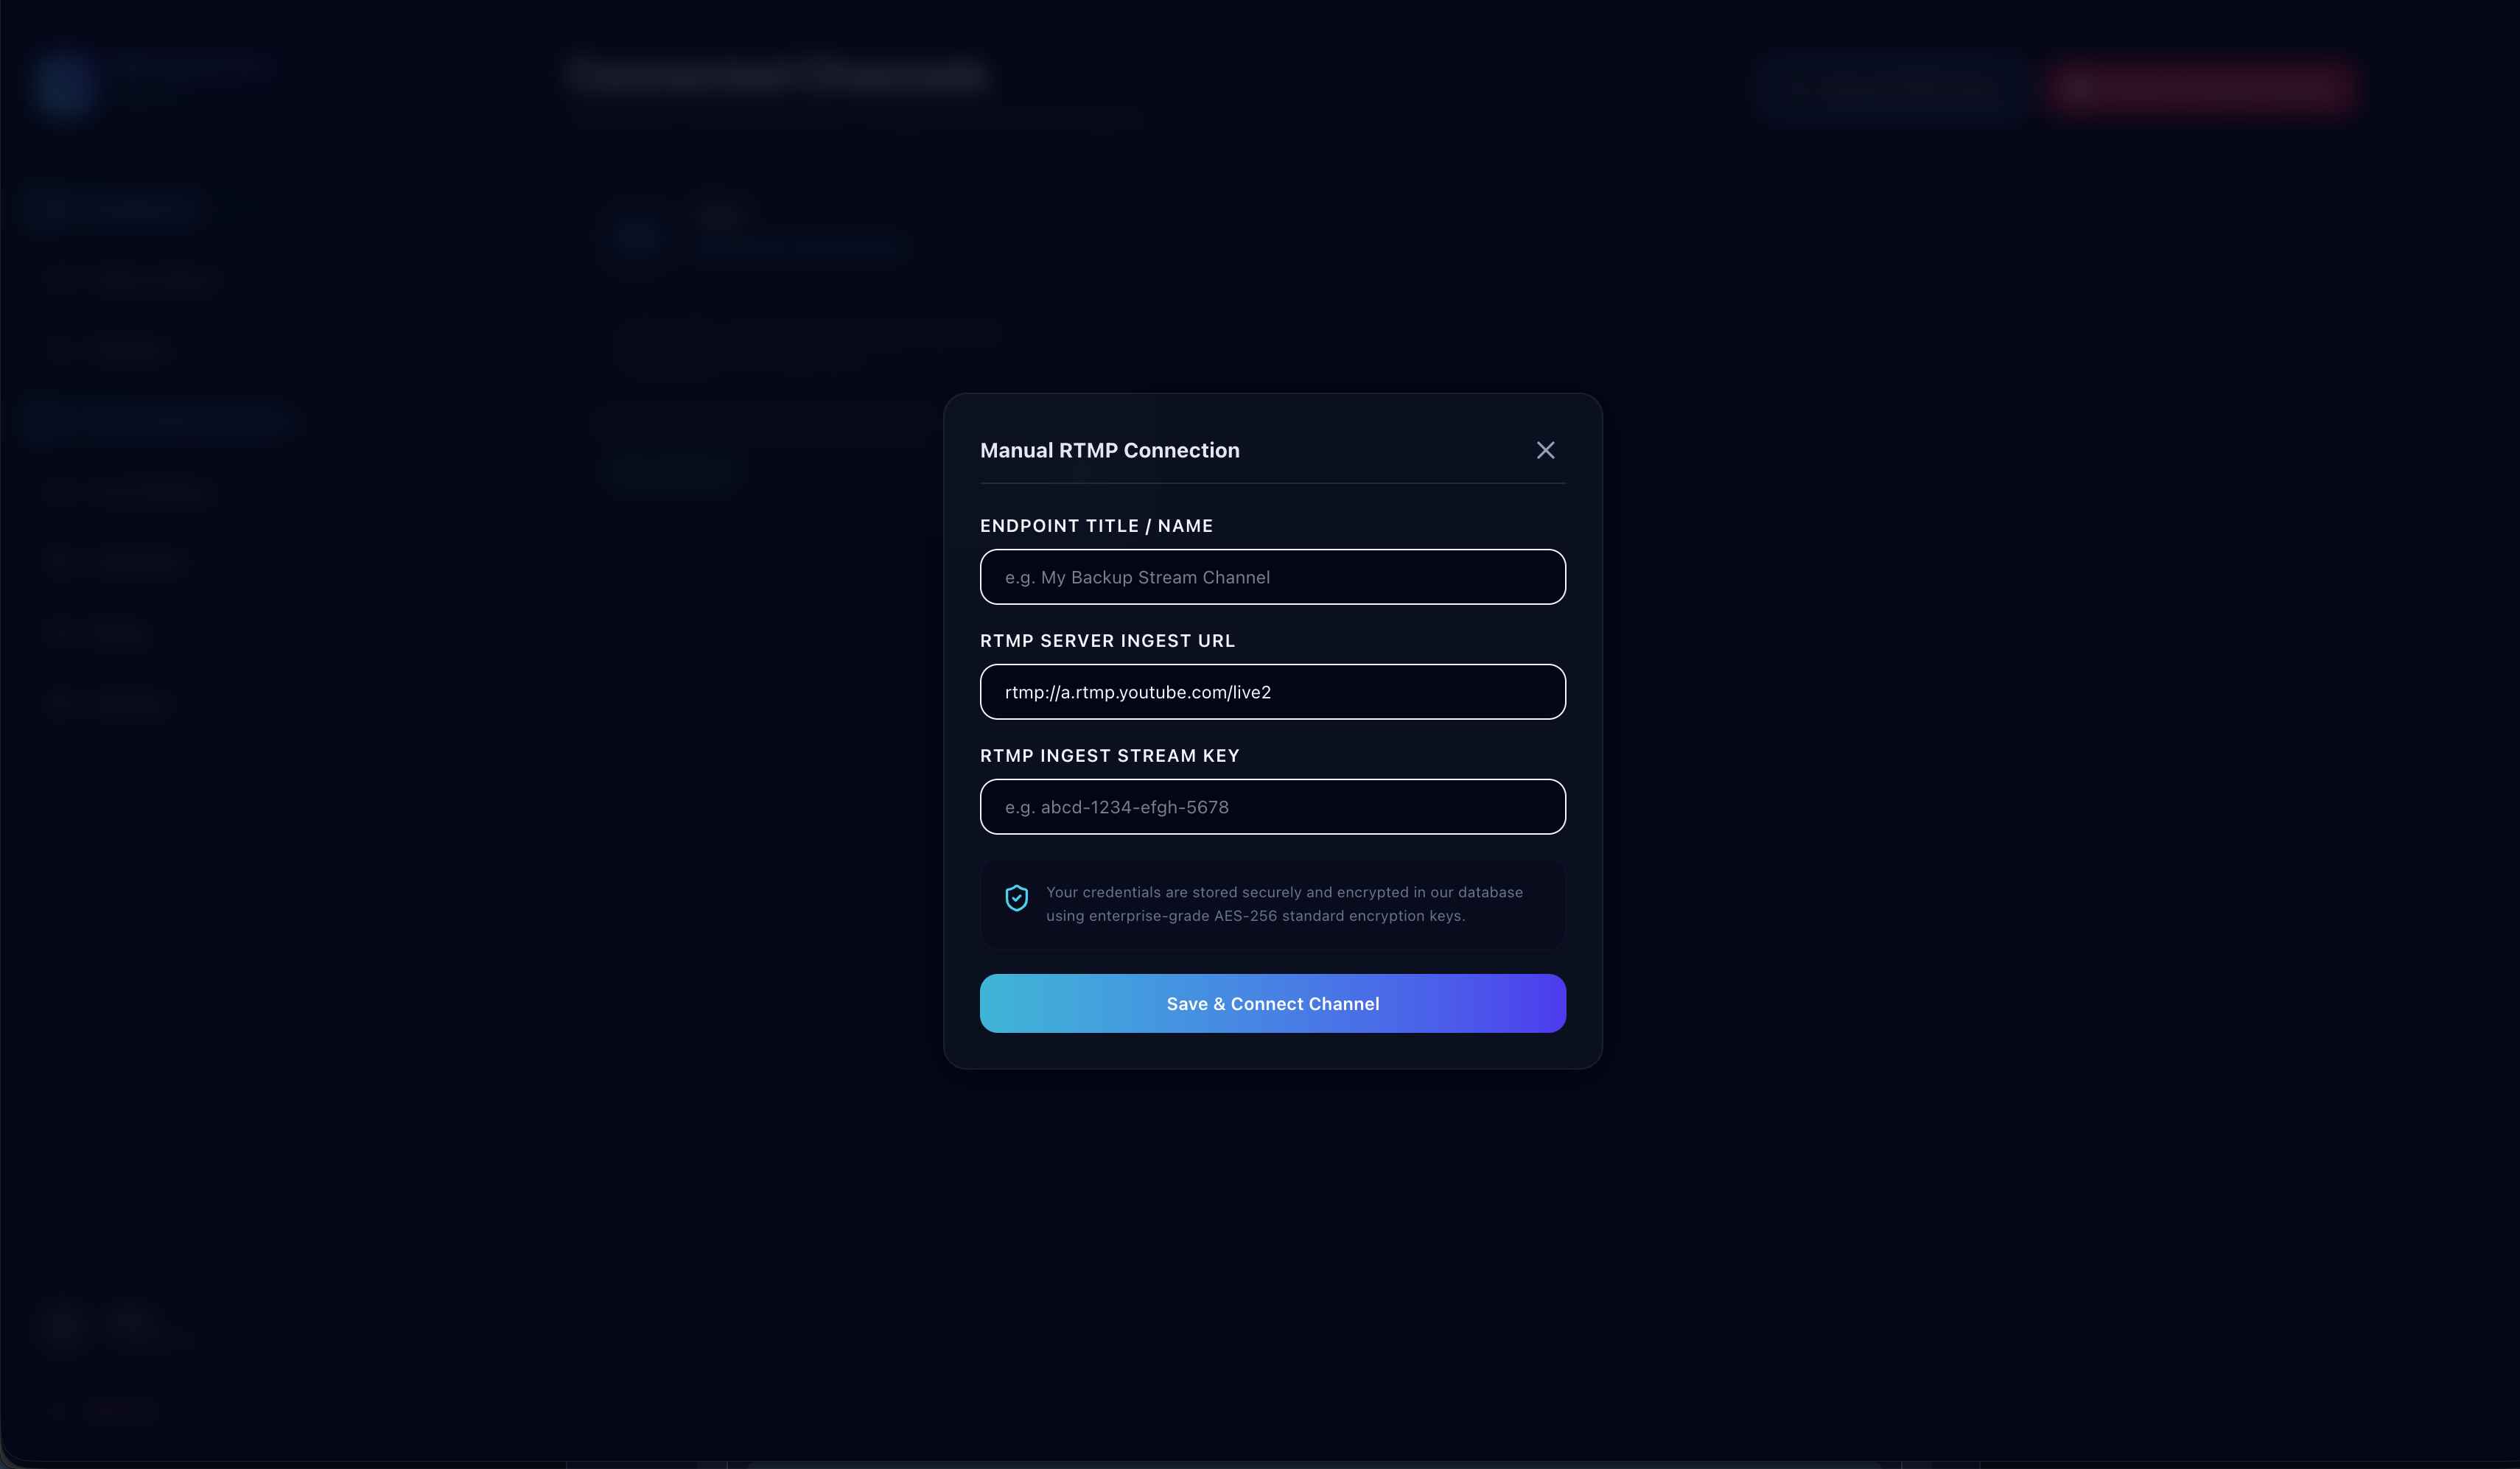
How to Get YouTube Stream Key

IMPORTANT

Learn how to find your unique streaming key from YouTube Studio. This key is required to connect YtLive Stream to your YouTube channel.

Method 1: Via YouTube Studio (Recommended)

  • 1 Go to YouTube Studio and sign in to your account
  • 2 Click "Create" button in the top right corner (camera icon with +)
  • 3 Select "Go live" from the dropdown menu
  • 4 In the live dashboard, look for the "Stream Settings" section on the right side
  • 5 Find the "Stream Key" field and click "Copy" button
  • 6 Paste this key in YtLive Stream when setting up your live stream

Method 2: Direct Access

  • β†’ Visit: YouTube Studio Live Dashboard
  • β†’ Select "Stream" tab (not "Webcam" or "Manage")
  • β†’ Your stream key will be displayed in the stream settings panel

πŸ“Έ Screen Example: YouTube Studio Stream Key Location

YouTube Studio β†’ Go Live β†’ Stream Settings

Stream Key Location:

Stream Name: YtLive Stream

Stream Key: β€’β€’β€’β€’-β€’β€’β€’β€’-β€’β€’β€’β€’-β€’β€’β€’β€’-β€’β€’β€’β€’

⚠️ Never share your stream key publicly!

πŸ”’ Security Warning: Your stream key is like a password. Anyone with this key can stream to your channel. Never share it publicly or commit it to code repositories!

⚠️ Important Notes:

  • β€’ Stream keys may reset periodically - you'll need to get a new one
  • β€’ You must verify your YouTube channel before streaming (takes 24 hours)
  • β€’ New channels may have streaming restrictions initially
  • β€’ If your key is compromised, click "Reset" in YouTube Studio immediately

πŸ’‘ YtLive Stream Integration: When you connect your YouTube channel via OAuth in YtLive Stream, the system automatically retrieves your stream key. You usually don't need to manually copy it unless setting up manual RTMP streaming.

5

Live Streaming Setup

Configure and start your 24/7 live streams

5.1

Create New Stream

Set up a new live stream configuration.

Steps:

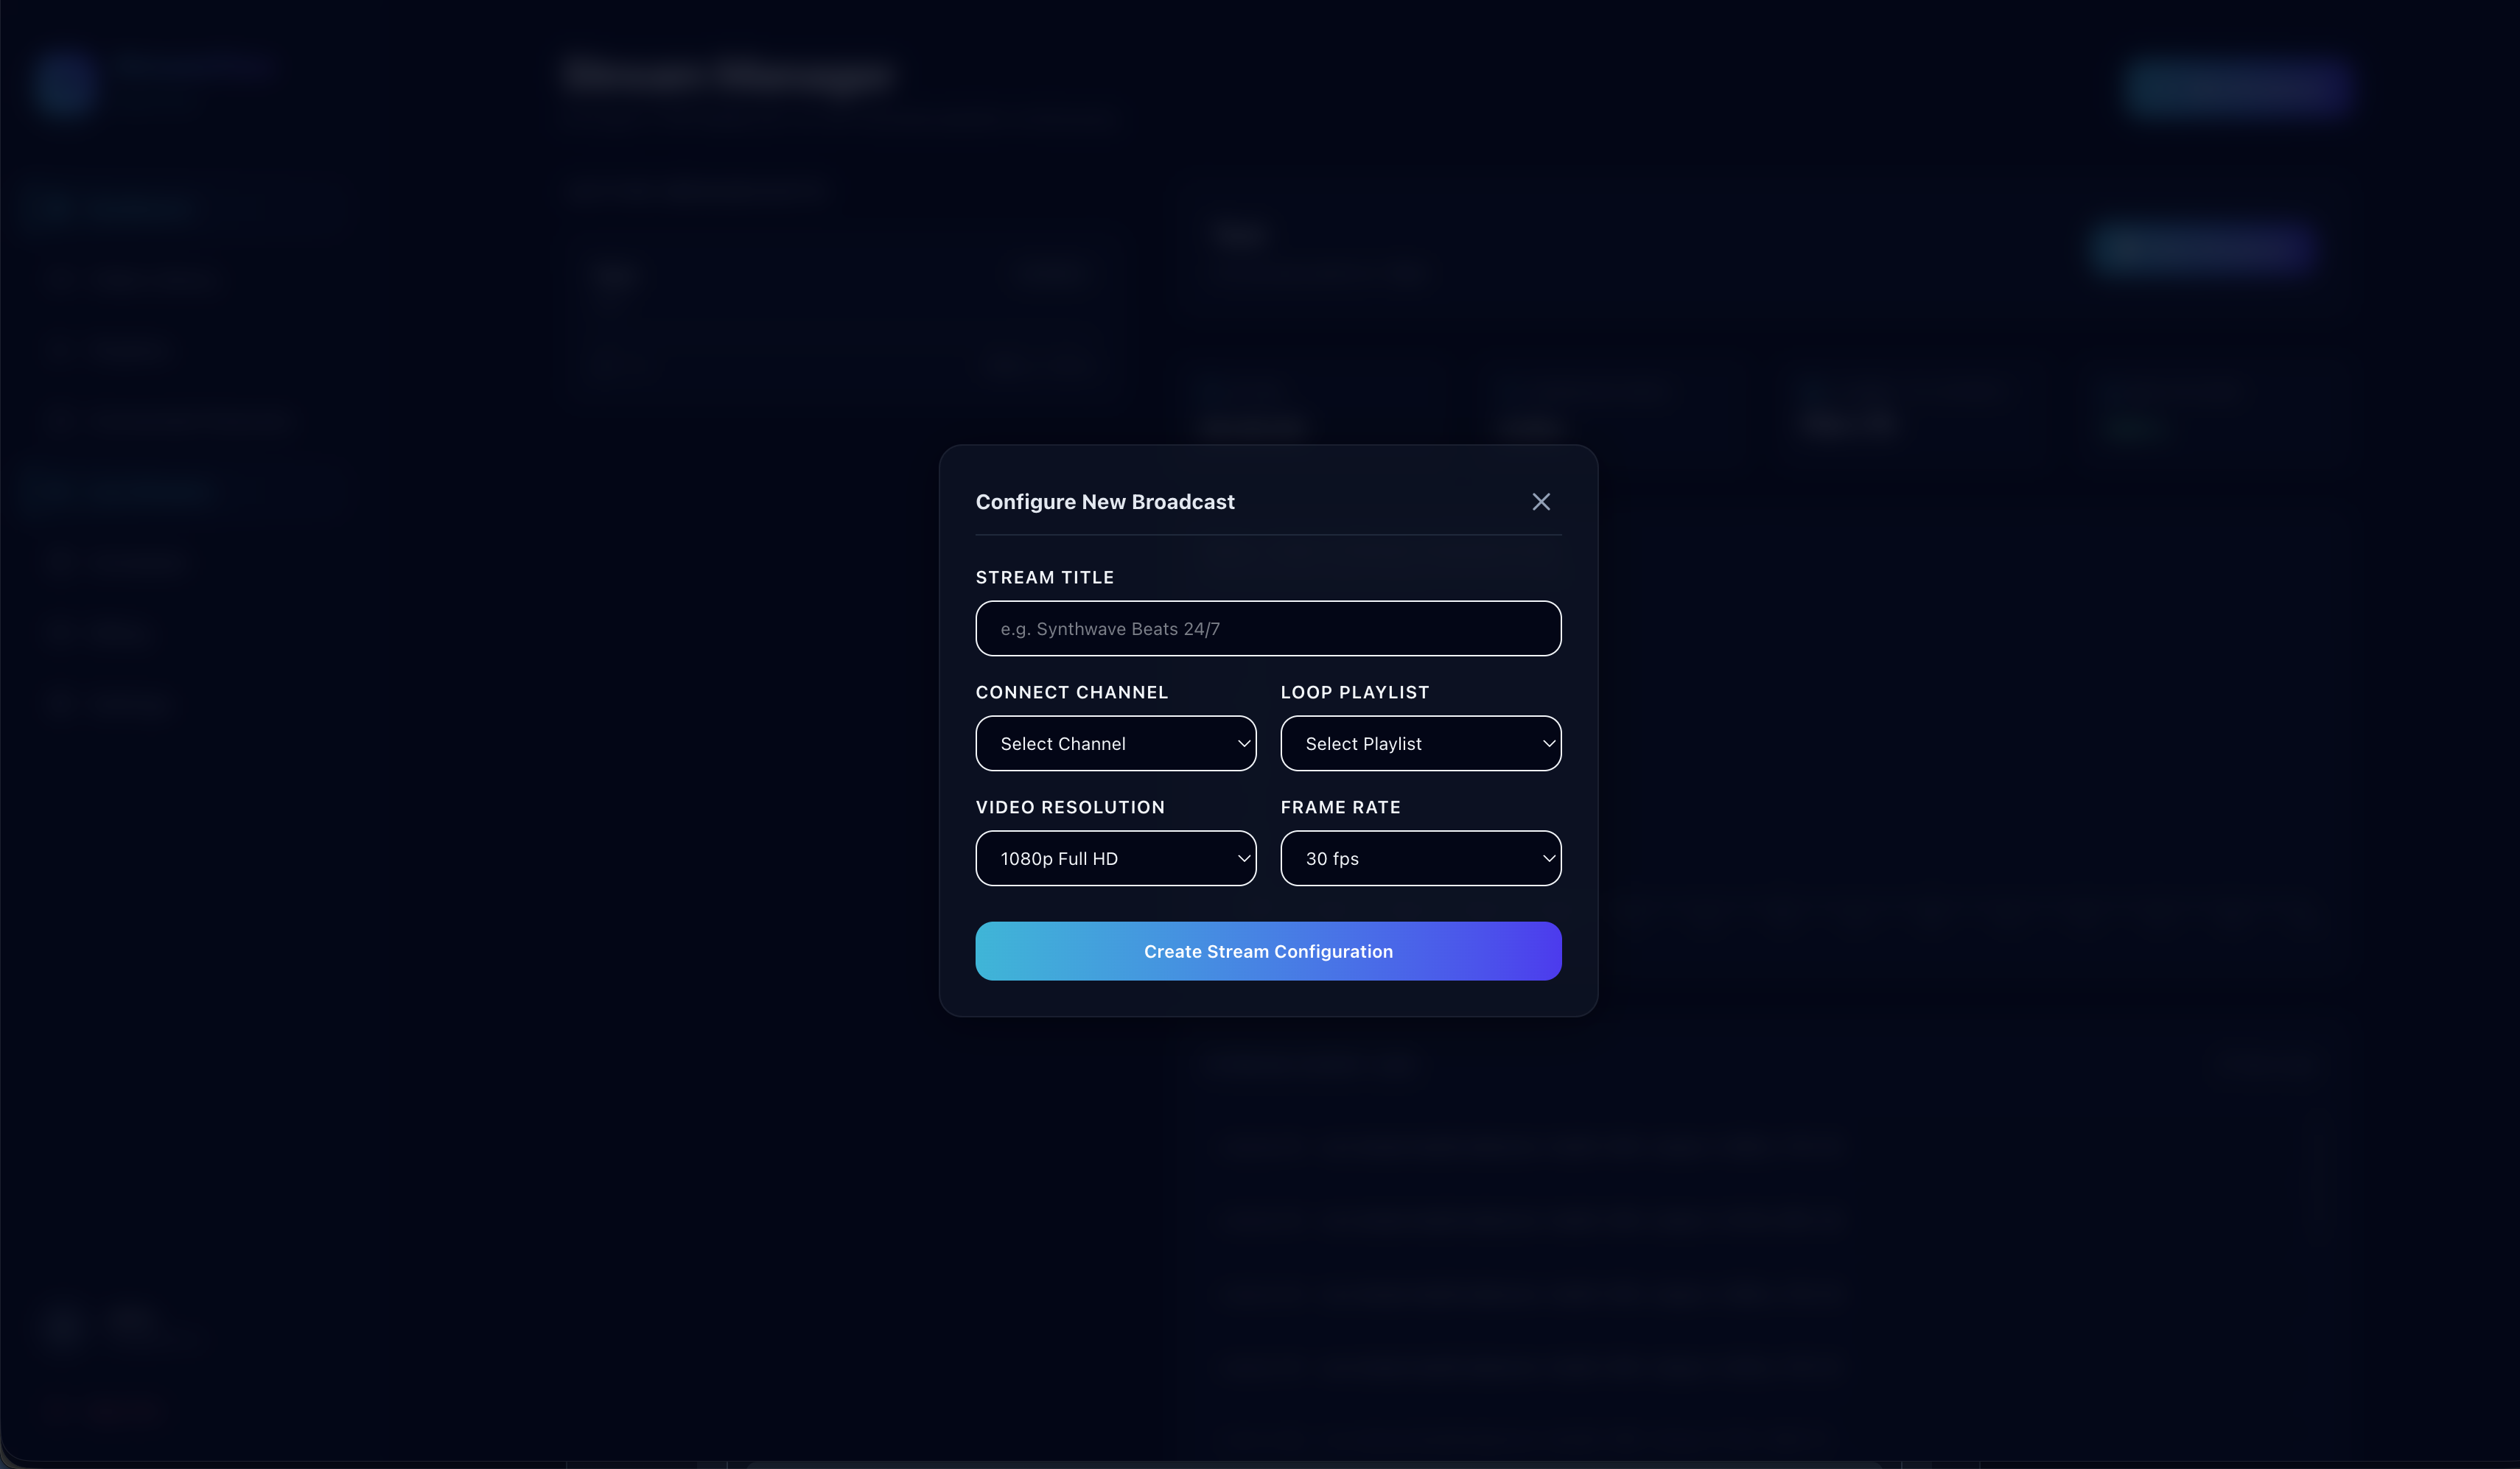
  • β†’ From dashboard, click on "Live Streams" in the left sidebar
  • β†’ Click "Create Stream" or "Add Live Stream" button
  • β†’ Enter stream name (e.g., "24/7 Music Channel", "News Loop")
  • β†’ Select connected YouTube channel from dropdown
  • β†’ Choose playlist to stream (created in Step 3)

πŸ“Έ Screen Example: Create Stream Form

Create Stream
5.2

Configure Stream Settings

Customize quality, overlay, and streaming parameters.

Stream Configuration:

  • πŸ“Ή Resolution: Choose 720p, 1080p, or custom
  • 🎞️ Frame Rate: Select 24fps, 30fps, or 60fps
  • πŸ”Š Audio Bitrate: 128kbps (standard) or 192kbps (high)
  • 🎨 Overlay: Add custom logo, text, or alerts (optional)
  • πŸ“ Stream Title: Set YouTube live stream title
  • 🏷️ Description & Tags: Add metadata for discoverability
  • πŸ”’ Privacy: Public, Unlisted, or Private

πŸ“Έ Screen Example: Stream Settings Panel

Stream Settings
5.3

Start Live Stream

Go live immediately or schedule for later.

To Start Streaming Now:

  • β†’ Review all settings and click "Save Stream"
  • β†’ Click "Go Live" or "Start Stream" button
  • β†’ System will initialize FFmpeg streaming engine (30-60 seconds)
  • β†’ Status changes to "LIVE" with green indicator
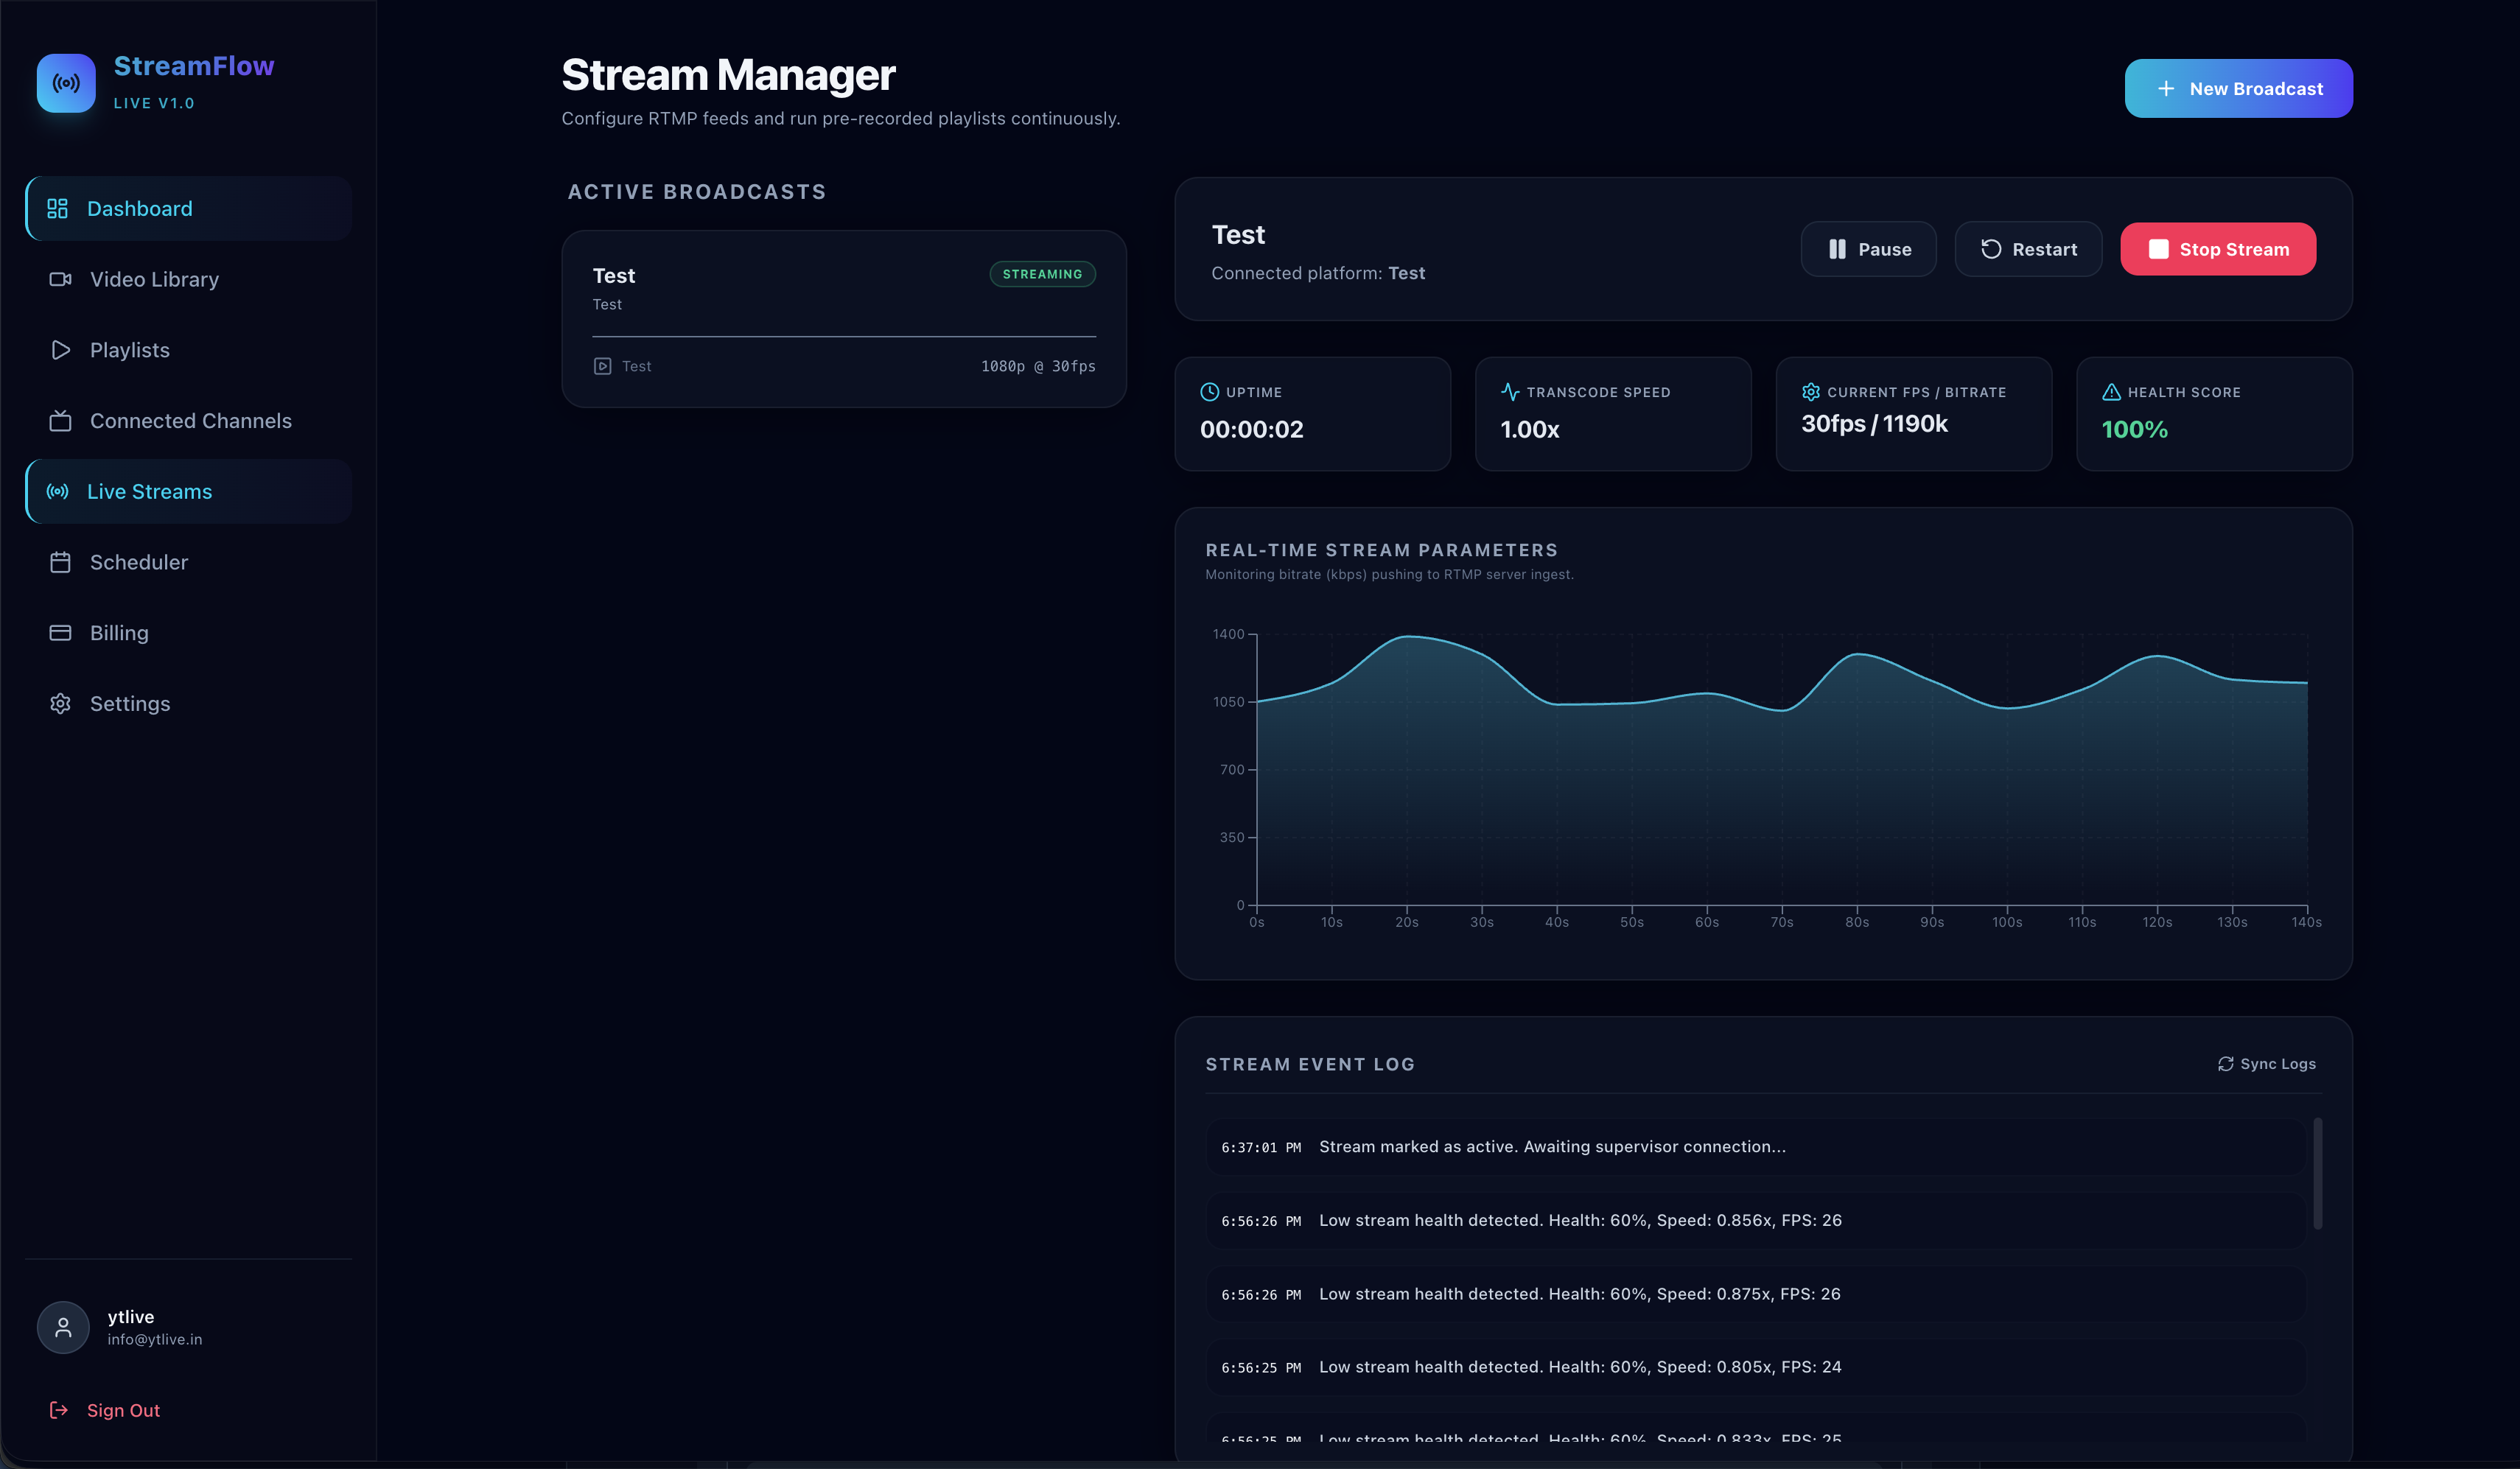
  • β†’ Monitor stream health in real-time dashboard

Stream Monitoring:

  • πŸ“Š View live metrics: bitrate, FPS, viewers, uptime
  • ⚠️ Receive alerts for any streaming issues
  • πŸ›‘ Click "Stop Stream" to end broadcast

πŸ“Έ Screen Example: Live Stream Dashboard

Live Stream Dashboard

πŸŽ‰ Congratulations! Your 24/7 live stream is now running. The cloud server will continue streaming even if you close your browser!

6

Stream Scheduler

Automate your streaming schedule

6.1

Access Scheduler

Navigate to the scheduling interface.

Steps:

  • β†’ From dashboard, click on "Scheduler" in the left sidebar
  • β†’ View calendar view or list view of scheduled streams
  • β†’ Click "Add Schedule" or "Create New Schedule" button

πŸ“Έ Screen Example: Scheduler Calendar View

[Screenshot: Calendar showing scheduled streams with time blocks]
6.2

Create Schedule

Set up automated streaming times.

Steps:

  • β†’ Select Stream: Choose which stream configuration to use
  • β†’ Start Date & Time: Set when stream should begin
  • β†’ End Date & Time: Set when stream should stop (or leave blank for continuous)
  • β†’ Recurrence: Choose schedule pattern:
    • β€’ One-time: Single stream event
    • β€’ Daily: Same time every day
    • β€’ Weekly: Specific days each week
    • β€’ Custom: Advanced recurring pattern
  • β†’ Timezone: Ensure correct timezone is selected
  • β†’ Click "Create Schedule" to save

πŸ“Έ Screen Example: Create Schedule Form

[Screenshot: Schedule creation form with date/time pickers, recurrence options, and stream selector]
6.3

Manage Schedules

Edit, pause, or delete scheduled streams.

Schedule Management:

  • πŸ“‹ View All: See upcoming and past schedules in calendar or list
  • ✏️ Edit: Modify time, date, or stream settings
  • ⏸️ Pause: Temporarily disable schedule without deleting
  • ▢️ Resume: Reactivate paused schedules
  • πŸ—‘οΈ Delete: Remove schedule permanently
  • πŸ“Š History: View past stream performance and logs

πŸ“Έ Screen Example: Schedule Management List

[Screenshot: List of scheduled streams with edit, pause, and delete actions]

πŸ’‘ Pro Tip: Set up different playlists for different times of day. Example: Morning news, afternoon music, evening tutorials - all automated!

6.4

Example: 24/7 Weekly Schedule

Set up continuous streaming with different content throughout the week.

Sample Setup:

Morning Block (6 AM - 12 PM)

Playlist: "Morning News & Updates"

Schedule: Daily, 6:00 AM - 12:00 PM

Afternoon Block (12 PM - 6 PM)

Playlist: "Music Mix & Entertainment"

Schedule: Daily, 12:00 PM - 6:00 PM

Evening Block (6 PM - 12 AM)

Playlist: "Tutorial Series & Reviews"

Schedule: Daily, 6:00 PM - 12:00 AM

Night Block (12 AM - 6 AM)

Playlist: "Chill Music & Ambient"

Schedule: Daily, 12:00 AM - 6:00 AM

πŸš€ You're All Set! With this schedule, your channel streams 24/7 with different content automatically. No manual intervention needed!

Quick Reference Guide

Getting Started Checklist

  • ☐ Create account and log in
  • ☐ Choose subscription plan
  • ☐ Connect YouTube channel
  • ☐ Add videos to library
  • ☐ Create playlists
  • ☐ Set up live stream
  • ☐ Configure scheduler (optional)
  • ☐ Go live!

Common Shortcuts

  • Dashboard: Main control panel
  • Video Library: All your content
  • Playlists: Organized video groups
  • Channels: Connected YouTube accounts
  • Live Streams: Active stream configs
  • Scheduler: Automated streaming
  • Analytics: Performance metrics
  • Settings: Account preferences

Troubleshooting Tips

  • ❓ Stream not starting? Check channel connection
  • ❓ Video won't import? Verify YouTube URL is valid
  • ❓ Poor quality? Increase resolution/bitrate settings
  • ❓ Schedule not working? Check timezone settings
  • ❓ Channel disconnected? Re-authorize OAuth

Need Help?

  • πŸ“§ Email: sales@ytlive.in
  • πŸ“ž Phone: +91-7404664714
  • πŸ’¬ Live Chat: Available in dashboard
  • πŸ“š Documentation: Help center
  • πŸŽ₯ Video Tutorials: YouTube channel
  • πŸ› Report Issues: Support ticket system

Stream Key Quick Reference

  • Where: YouTube Studio β†’ Go Live
  • Format: xxxx-xxxx-xxxx-xxxx-xxxx
  • Security: Never share publicly!
  • Reset: If compromised, reset immediately
  • Auto-fetch: YtLive Stream gets it automatically via OAuth